Before you can buy a label
Add a carrier first, in Settings › Shipping. That screen also holds your package presets and the addresses you ship from. You also need an origin address. A label ships from the store’s shipping origin address, falling back to your business address, and the buy-label page will not open without one.How labels are paid for
It depends on the carrier.
The Available credits card shows your balance. Owners and admins get a link
from it to Settings › Billing to
add more.
Buying one label
New shipping label opens Select orders to ship. Pick the fulfillments and select Continue. One selection takes you to the single-label form below. Several take you to the bulk table. You can also start from an order and select Buy shipping label there.1
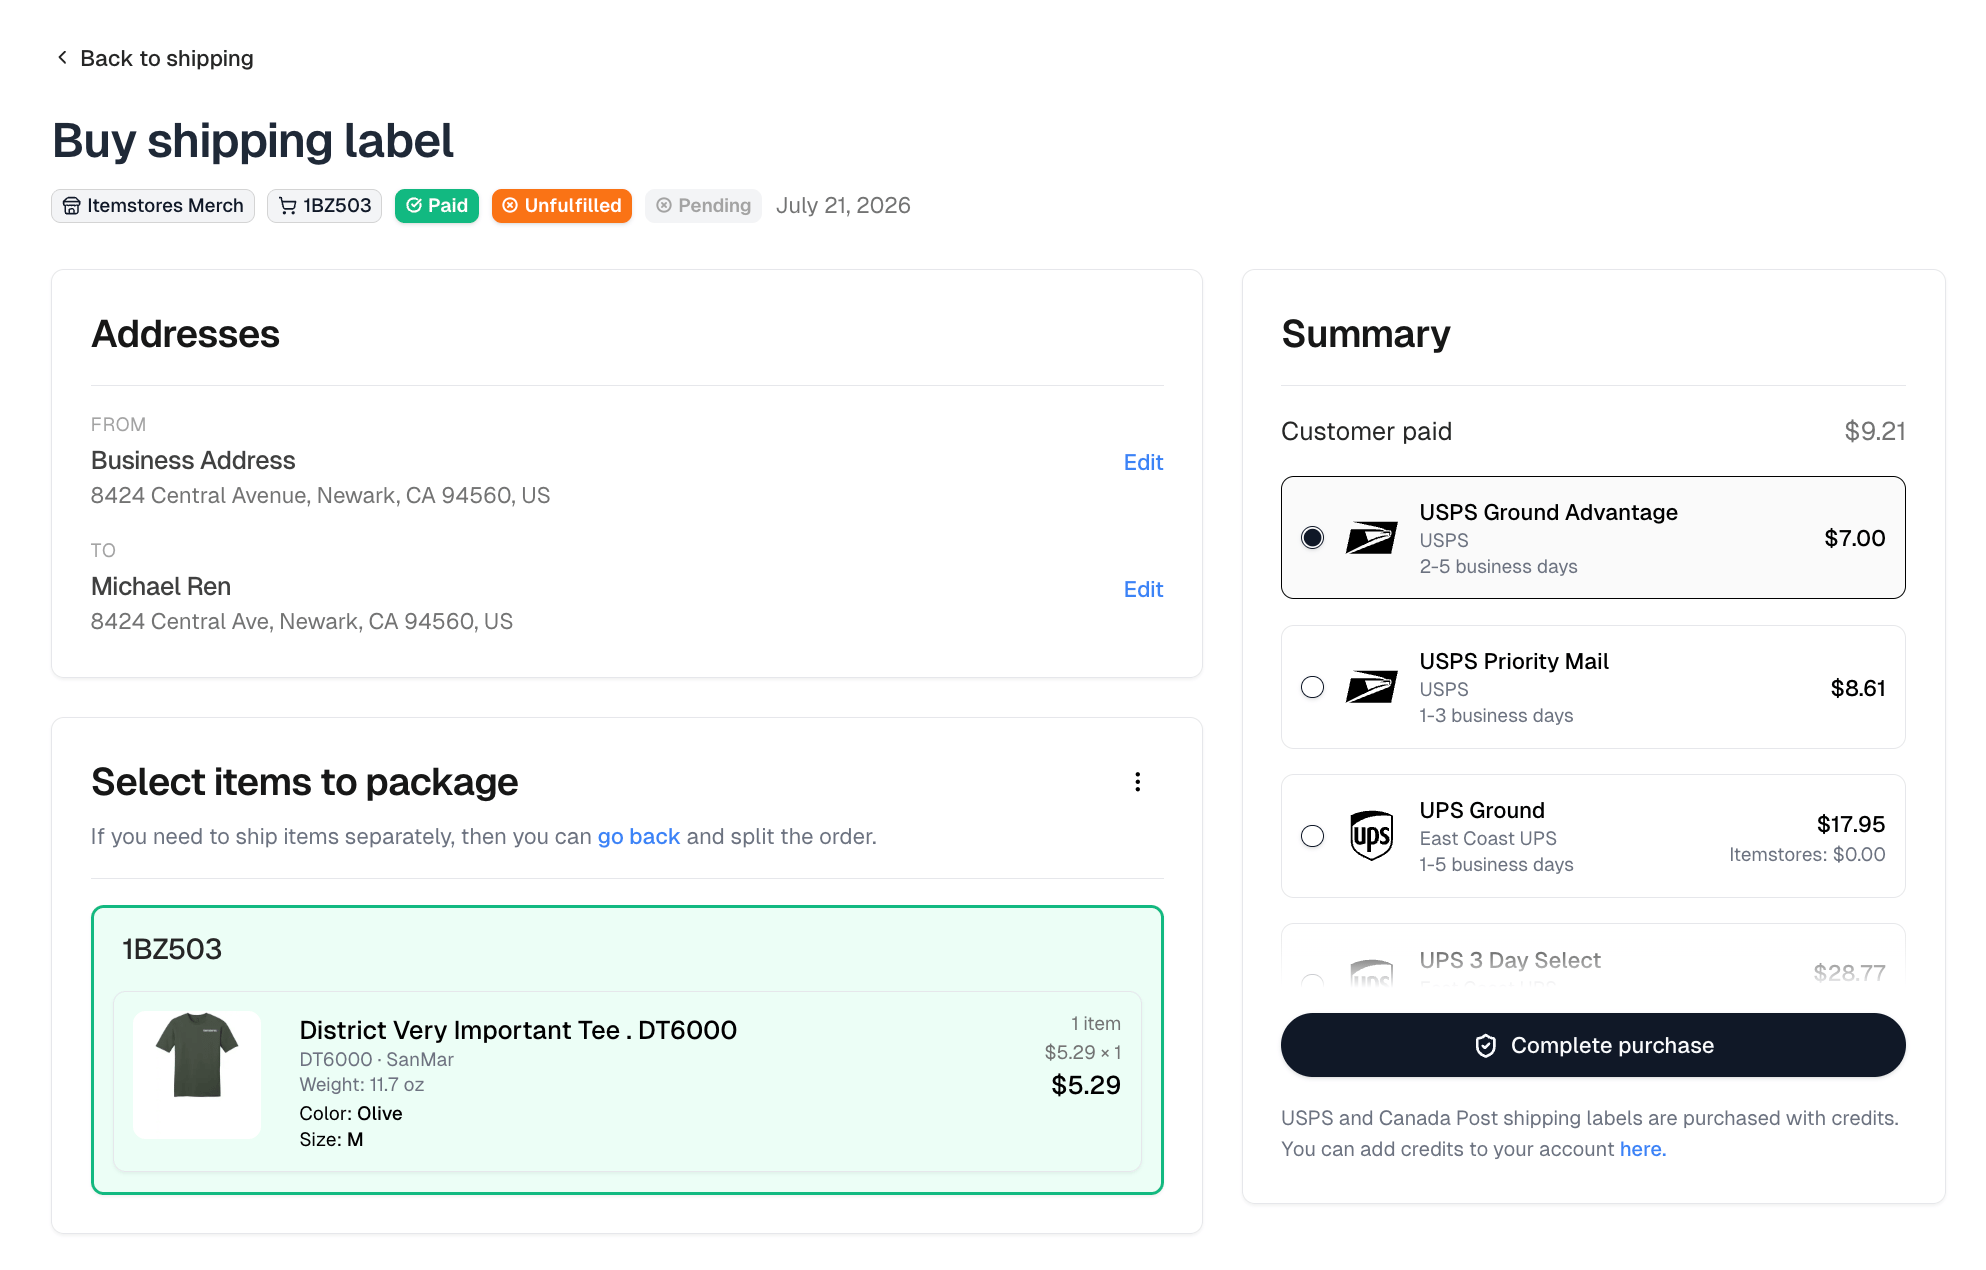
Check the addresses
From is the store’s shipping origin address, falling back to your
business address on an order that came from a quote. To is the
customer’s. Edit beside either one changes it for this label.
2
Choose what goes in the box
Select items to package lists the fulfillments this label can cover. To
ship items separately, go back and split the order instead. Fulfill Engine
fulfillments are not listed, because Fulfill Engine buys their labels.
3
Set the package
Under Edit package details, Change package picks a different box and
Total package weight is calculated from the items and the box until you
type over it.
4
Pick a rate
Rates come back live from every connected carrier account, each with its
service, account, transit time and price, next to what the customer paid.
Then Complete purchase, or Create label when the rate you picked is
on your own carrier account.
Combining orders into one box
The⋮ menu beside Select items to package holds Add from another order,
which pulls another order’s fulfillments into this box so they ship together.
Buying labels in bulk
Selecting more than one order in Select orders to ship, or Buy shipping labels on the Orders list, opens a table of every label with its addresses, package, weight and service. Filter it with All, Ready or Needs attention. Needs attention is the rows that cannot ship yet, so you can fix those rather than scanning the whole table. Select rows and a toolbar appears with Edit from address, Edit to address, Edit package and Edit shipping service, which apply to every selected row at once. A card above the table counts the labels ready for purchase, and its Preview shipping costs prices only those. The purchase dialog then shows the total, your credit balance, and what you will have left. Labels on your own carrier account are listed separately there and do not spend credits.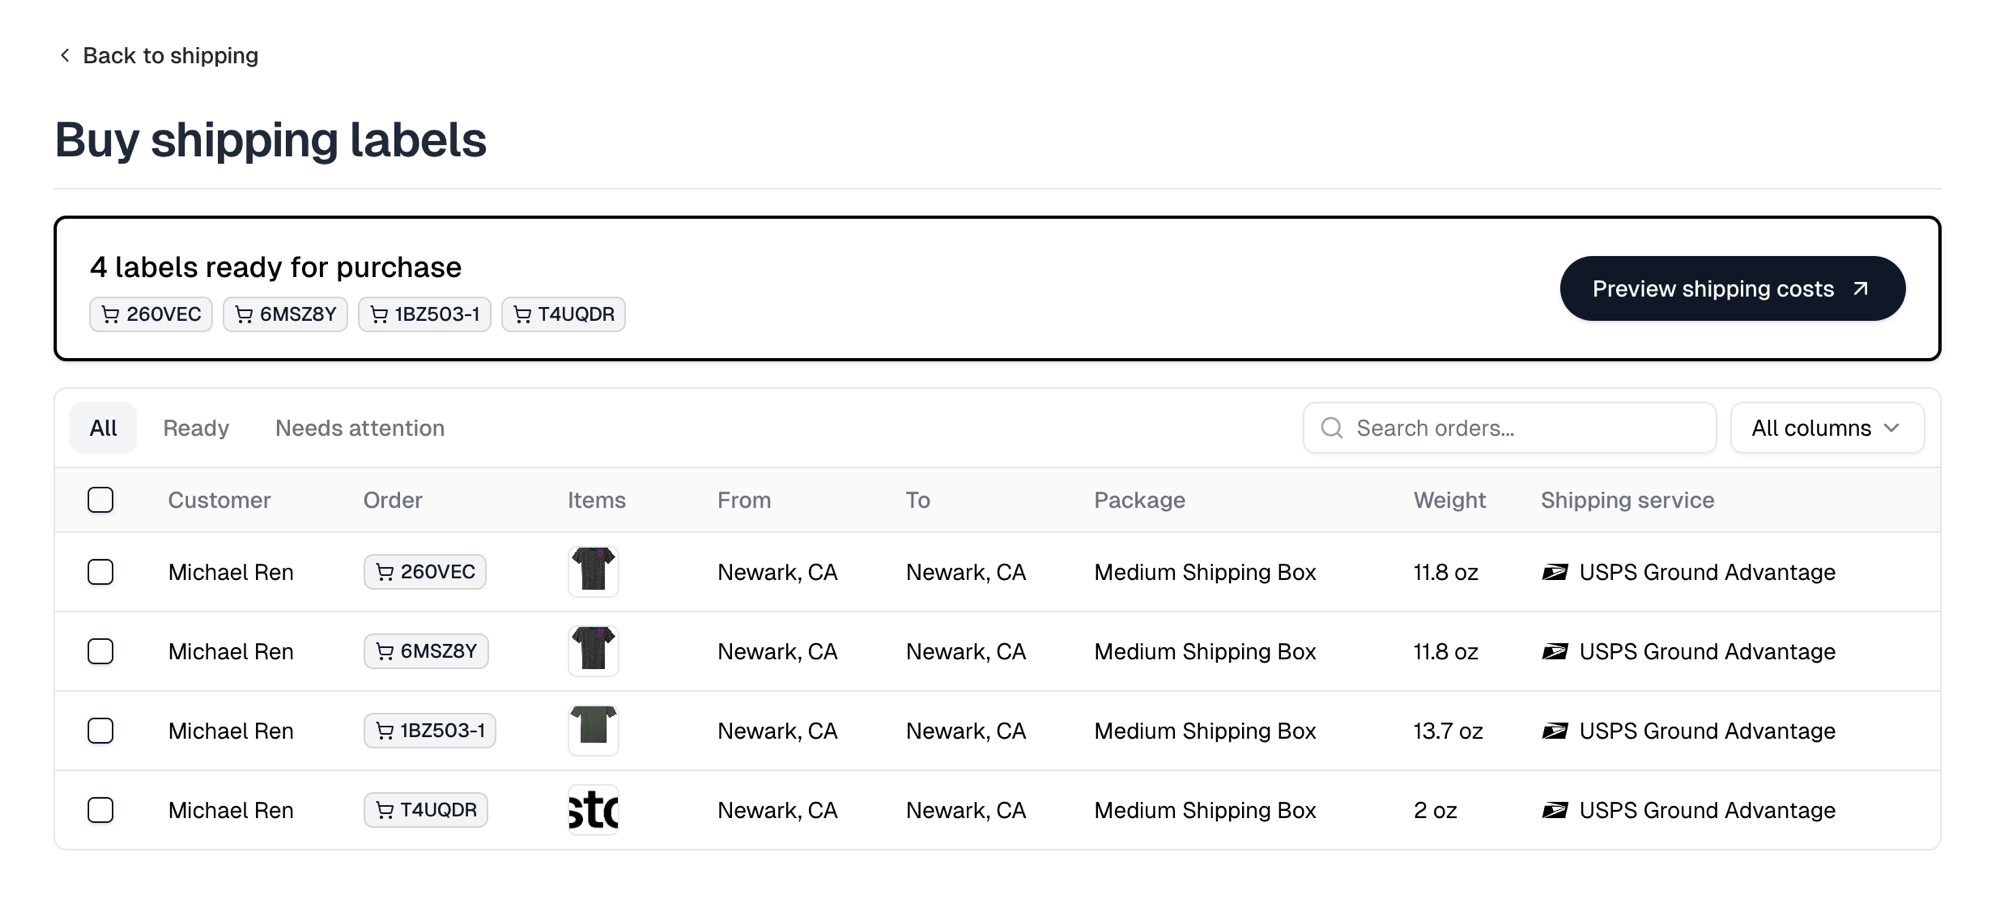
After buying
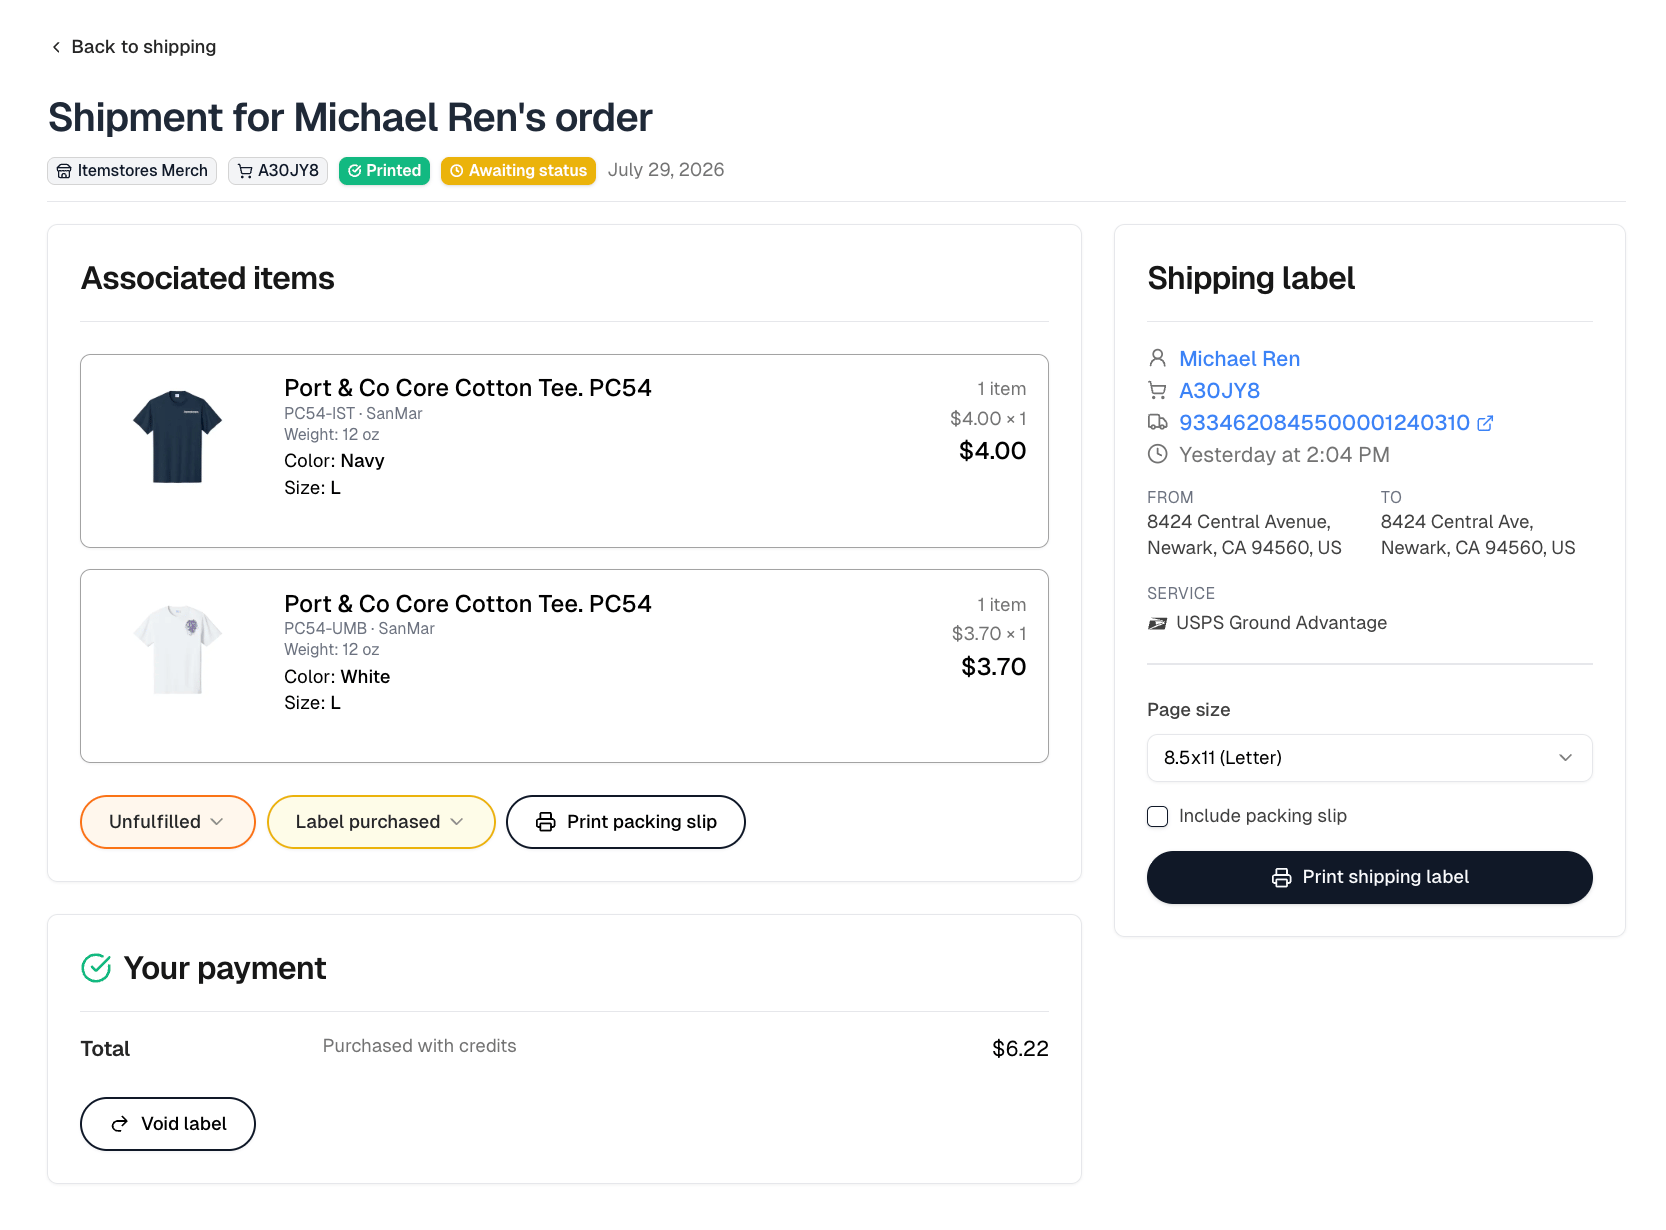
A shipment carries a Print status and a Tracking status. Print shipping label offers a Page size of 8.5x11 (Letter), A4 or 4x6, and can Include packing slip. Print packing slip, on each fulfillment’s card, prints one on its own. Void label sits under Your payment with what the label cost. What it does depends on who paid for the label.
A voided shipment shows a Voided badge in the list.