Creating a work order
New work order, then Add items to choose what to make. The dialog’s Group by control is the useful part. Group items by Order, Product, Artwork, Store or Decoration method, depending on how you want to batch the work. Grouping by decoration method gathers everything being embroidered; grouping by artwork gathers every garment carrying one design. Each group shows how many items it holds, and every row names the order and customer it came from, so you can tell what you are pulling into the job. It offers only items that are still waiting to be made. The order cannot be unpaid, cancelled or disputed, its fulfillment has to be Unfulfilled, and the item cannot already be on another work order.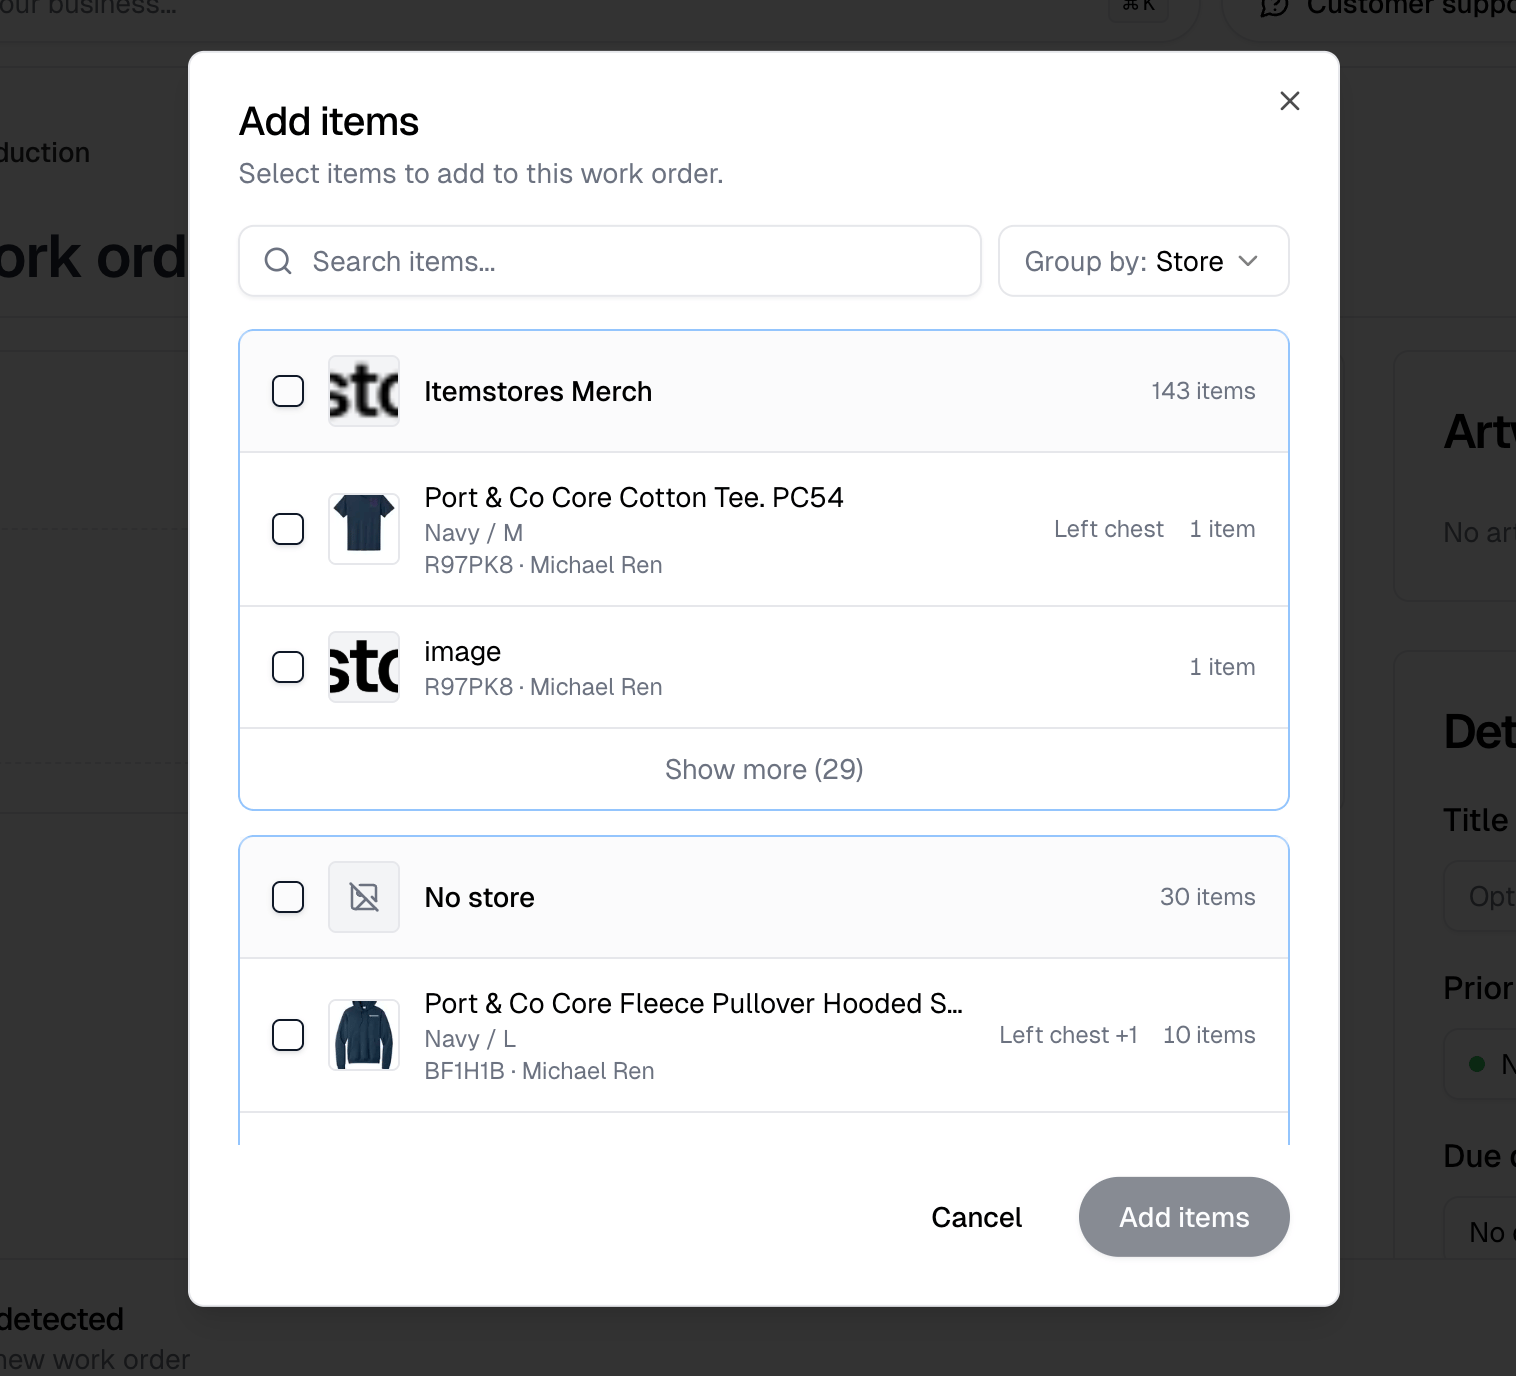
Create work order stays disabled until at least one item is added.
Starting one from a selection of orders
Select orders on the Orders list and choose New work order from its toolbar (up to 100 at a time). It opens New work order with those orders’ unmade items already added, the same way opening it from a single order’s Production tab does when nothing is there yet.An item already on another work order cannot be added a second time. It is
listed with Move these here instead, which moves it off its current work
order onto this one rather than copying it.
Artwork
The Artwork panel fills itself in from the items you added, one line per artwork, placement and colorway, with the quantity totaled across them. Add artwork adds a design the items did not bring, and every line’s Placement and Quantity stay editable. Each artwork carries its own status: Not ready, Pending or Ready. While any is not ready the board card shows a red Artwork not ready badge, and while any is pending it shows an amber Artwork pending one. On an open work order, Mark all ready sets them all at once.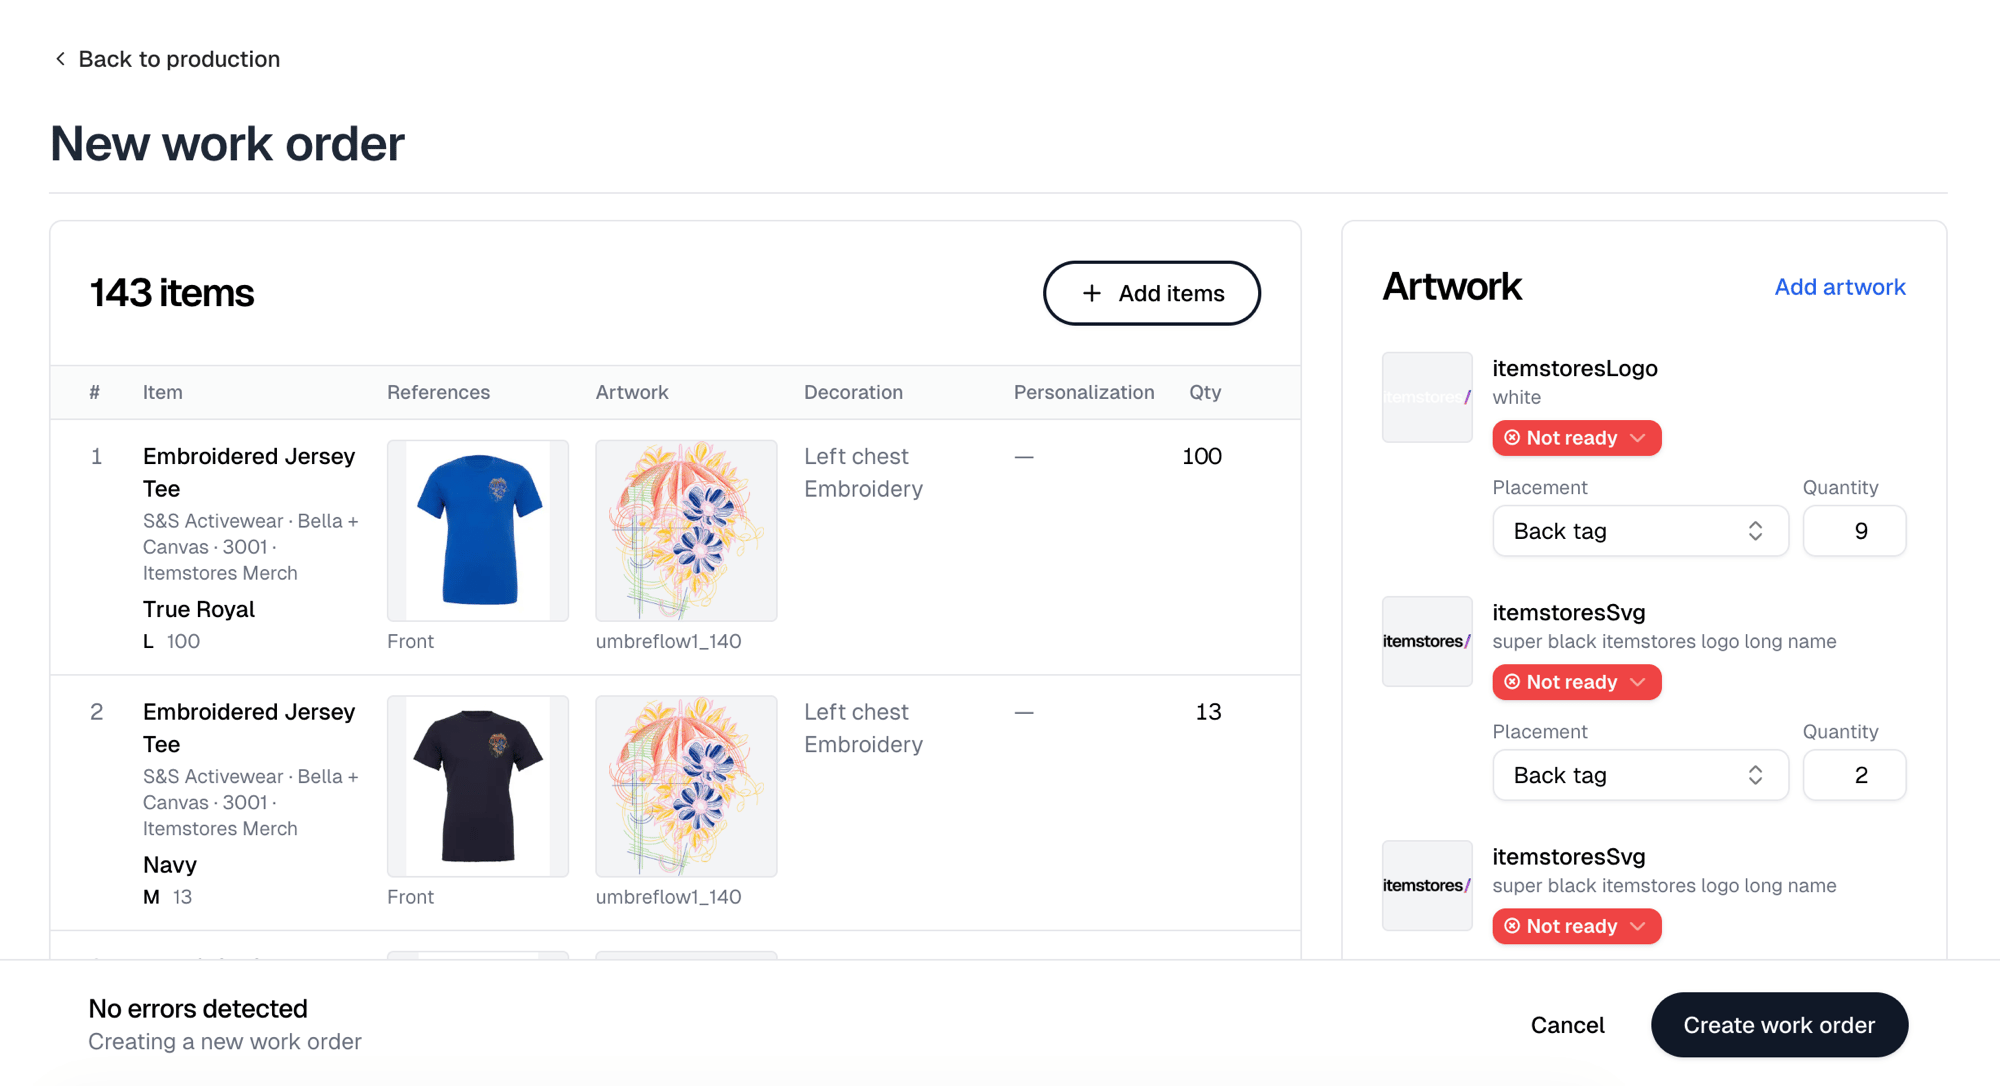
The board
Switch between Board and Calendar at the top. All, Assigned and Overdue narrow what you see. The board always opens with Unfulfilled and ends with Ready. Both are built in. The statuses you define sit between them. Each card is a work order, labeled with its title if it has one and its order numbers otherwise, and showing the customer, item count, product thumbnails, decoration method and placement, assignees, and the due date. A priority badge appears only on Urgent and High. Drag a card to move it between columns.Statuses are yours to define
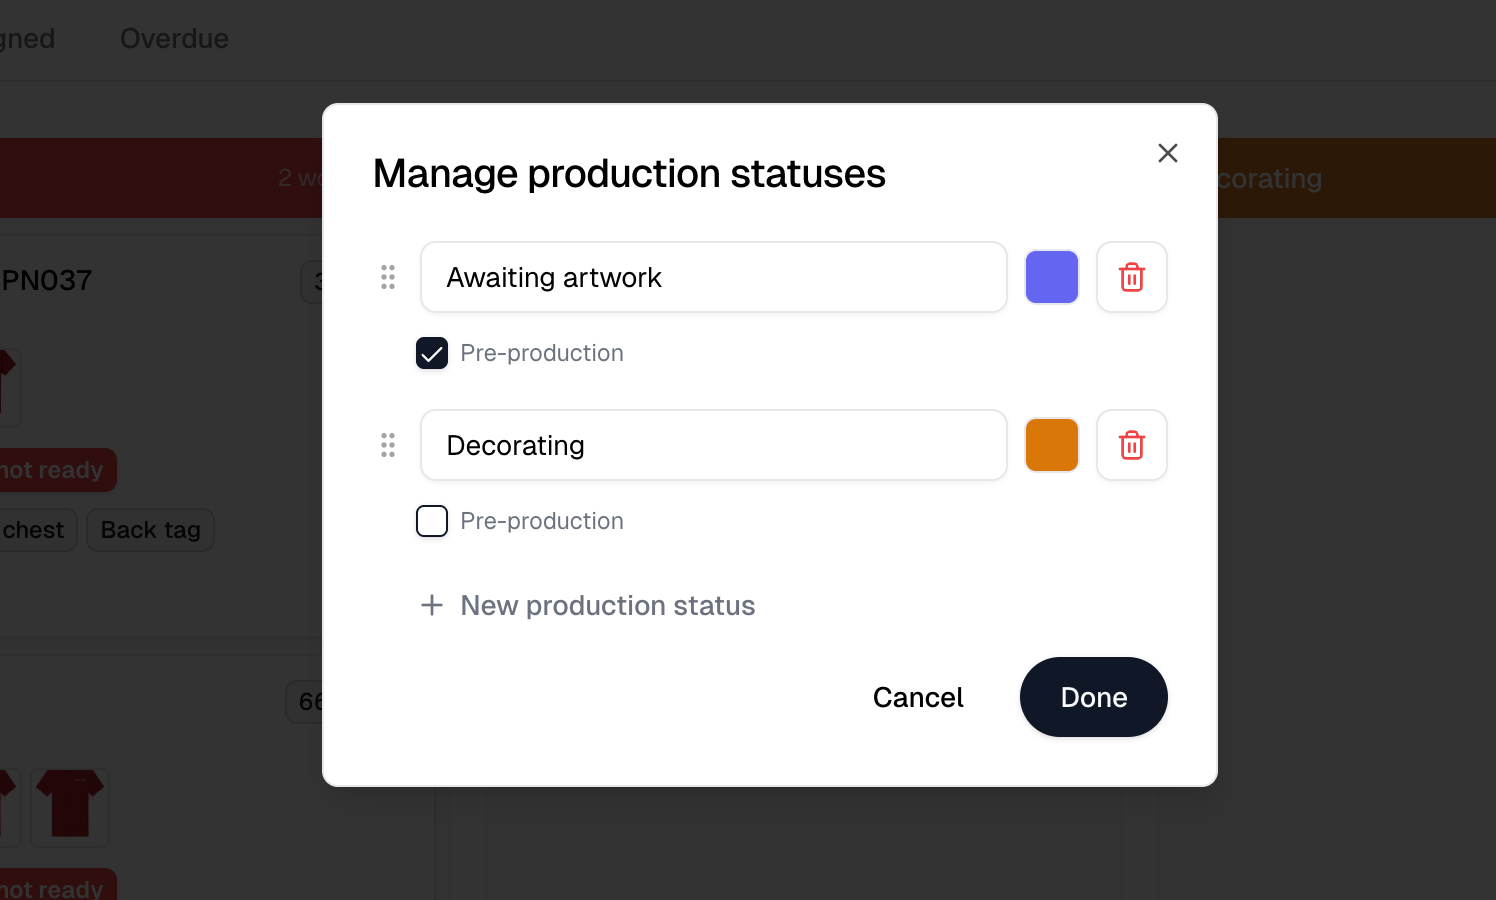
Statuses opens Manage production statuses, which lists the statuses you have added. Rename, recolor, reorder and delete them there, add one with New production status, and Done saves. Unfulfilled and Ready are not in the list and cannot be changed. Mark a status Pre-production for the stages that happen before decorating starts, such as waiting on artwork. That is what decides whether a card dropped in it sets its orders to Pre-production rather than In production.Deleting a status moves every work order in it back to Unfulfilled.
Working the order
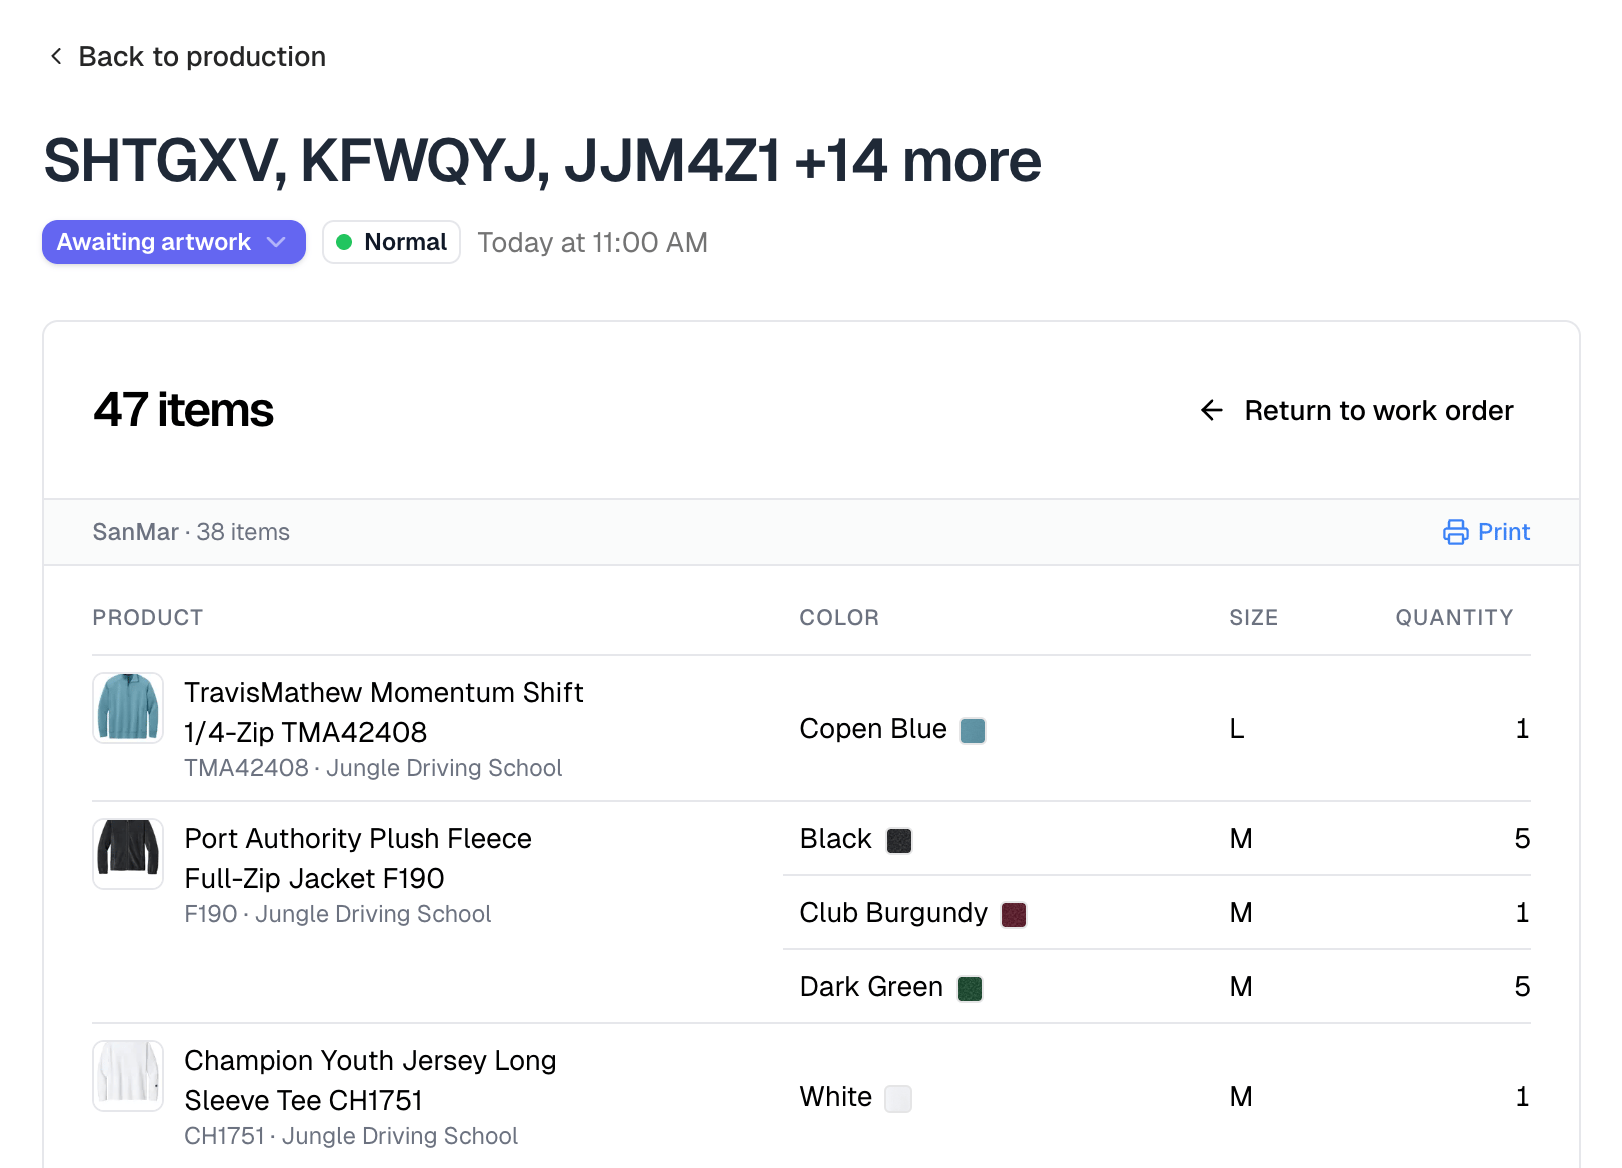
Open a work order to see every line: the item, its color and size breakdown, reference photos, the artwork, the decoration method and placement, any personalization, and the quantity. Files a customer uploaded show as their filename. Select one to open it in a new tab. Change the status with the dropdown beside the work order’s name. It moves the card and rewrites the order statuses exactly as dragging does. Delete removes the work order from the board. Its orders go back to Unfulfilled, and their items become available to a new work order again.Printing
Print work order on the items panel produces the work order as a document for the shop floor, including the reference photos and the size breakdown. Print packing slips produces one document with a packing slip for every fulfillment on the work order. View as purchase order shows the same items as the purchase orders they would need, one per supplier. Nothing is created. Each supplier has its own Print, which produces that purchase order as a document. Return to work order switches back. Create purchase orders opens a new purchase order filled with those items, one tab per supplier.