> ## Documentation Index
> Fetch the complete documentation index at: https://itemstores.com/help/llms.txt
> Use this file to discover all available pages before exploring further.
# Your first product
> Put your artwork on a blank and make something you can sell
A product is a blank with your artwork on it.
You need a blank and an artwork before you start. See
[Import blanks and artwork](/help/tutorials/import-blanks-and-artwork) if you have
neither yet.
## Pick your route
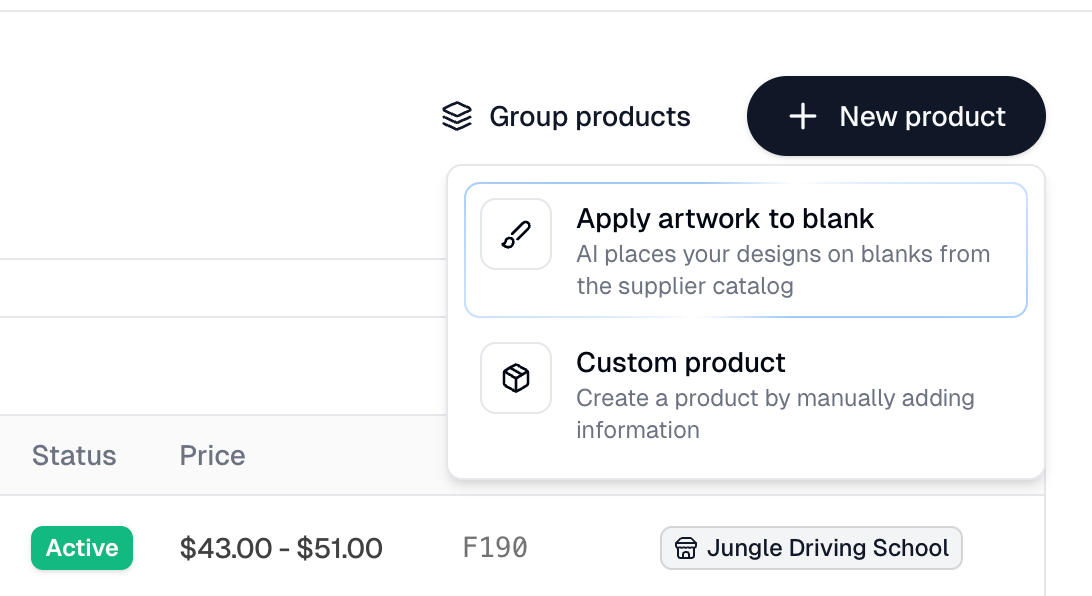
In [Products](https://itemstores.com/app/products), **New product** offers two:
| Option | Use it when |
| ---------------------- | ---------------------------------------------------------------------- |
| Apply artwork to blank | You are decorating a garment. This is the usual one |
| Custom product | You are selling something you define yourself, with no blank behind it |
 **Apply artwork to blank** then asks **What stays the same?**, which is really
asking which way you are working:
| Choice | You are doing this |
| ------------ | --------------------------------------- |
| Same blank | Putting several designs on one garment |
| Same artwork | Putting one design across many garments |
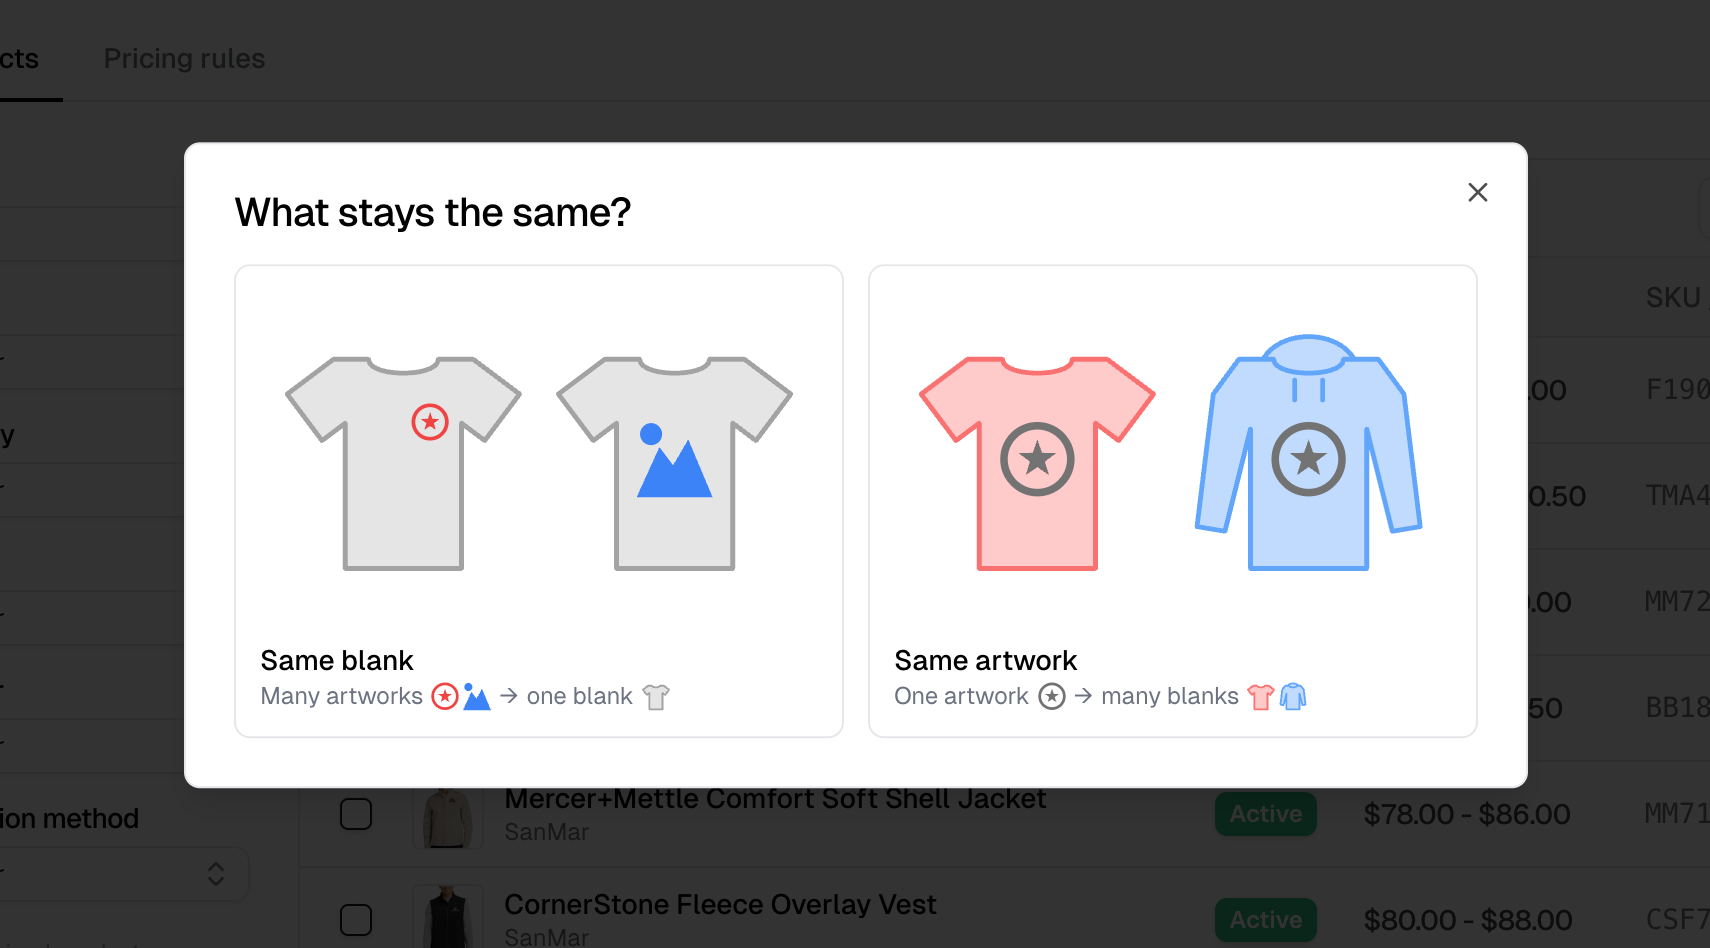
**Apply artwork to blank** then asks **What stays the same?**, which is really
asking which way you are working:
| Choice | You are doing this |
| ------------ | --------------------------------------- |
| Same blank | Putting several designs on one garment |
| Same artwork | Putting one design across many garments |
 ## One blank, several designs
**Same blank** opens a **Decorate a blank** picker. Choose one and you land in
the [decoration tool](/help/knowledge-base/blanks/decorate), which is also reachable
from any blank if you want to decorate one directly rather than starting from
Products. A discontinued blank is listed but cannot be picked.
Unless your business has exactly one store, a **Select a store** dialog
opens first. **Skip** leaves it unset, and the picker beside the page title
sets it later. One design can be created with no store. Two or more designs
become a product group, and a group cannot be saved until a store is set.
Each design needs a **Name**, up to 60 characters. Once there is more than
one design, that name is the label customers choose between on the finished
product group, so name it for what it is rather than "design 1".
Select one or more placements under **Artwork placement**, such as left
chest or full back. Each one you select adds a row below it where you pick
the artwork, and on a supplier blank a **Decoration method**. Leaving the
method blank uses the blank's own.
A placement greys out when another placement in the same design already
claims the view it would render on. Left chest and full front both render
on the front view, so selecting one disables the other.
**Product colors** decides which colors the product carries. The link beside
it reads **Disable all** while every color is on and **Enable all** once any
is off. **Disable all** leaves one color on rather than none, so you can
turn on just the few you want.
When the artwork has more than one colorway, each product color gets its
own, so a design can print light on dark garments and dark on light.
**Automatically assign colorways to light/dark colors** does the pairing,
and you can override any row. An artwork with a single colorway skips this
step.
Several placements on one design is how you get a left chest logo and a back
tag on one garment. **Add design** does something else: each design becomes its
own product, and two or more are collected into a product group that customers
pick between. A group holds at most 20 designs.
## One blank, several designs
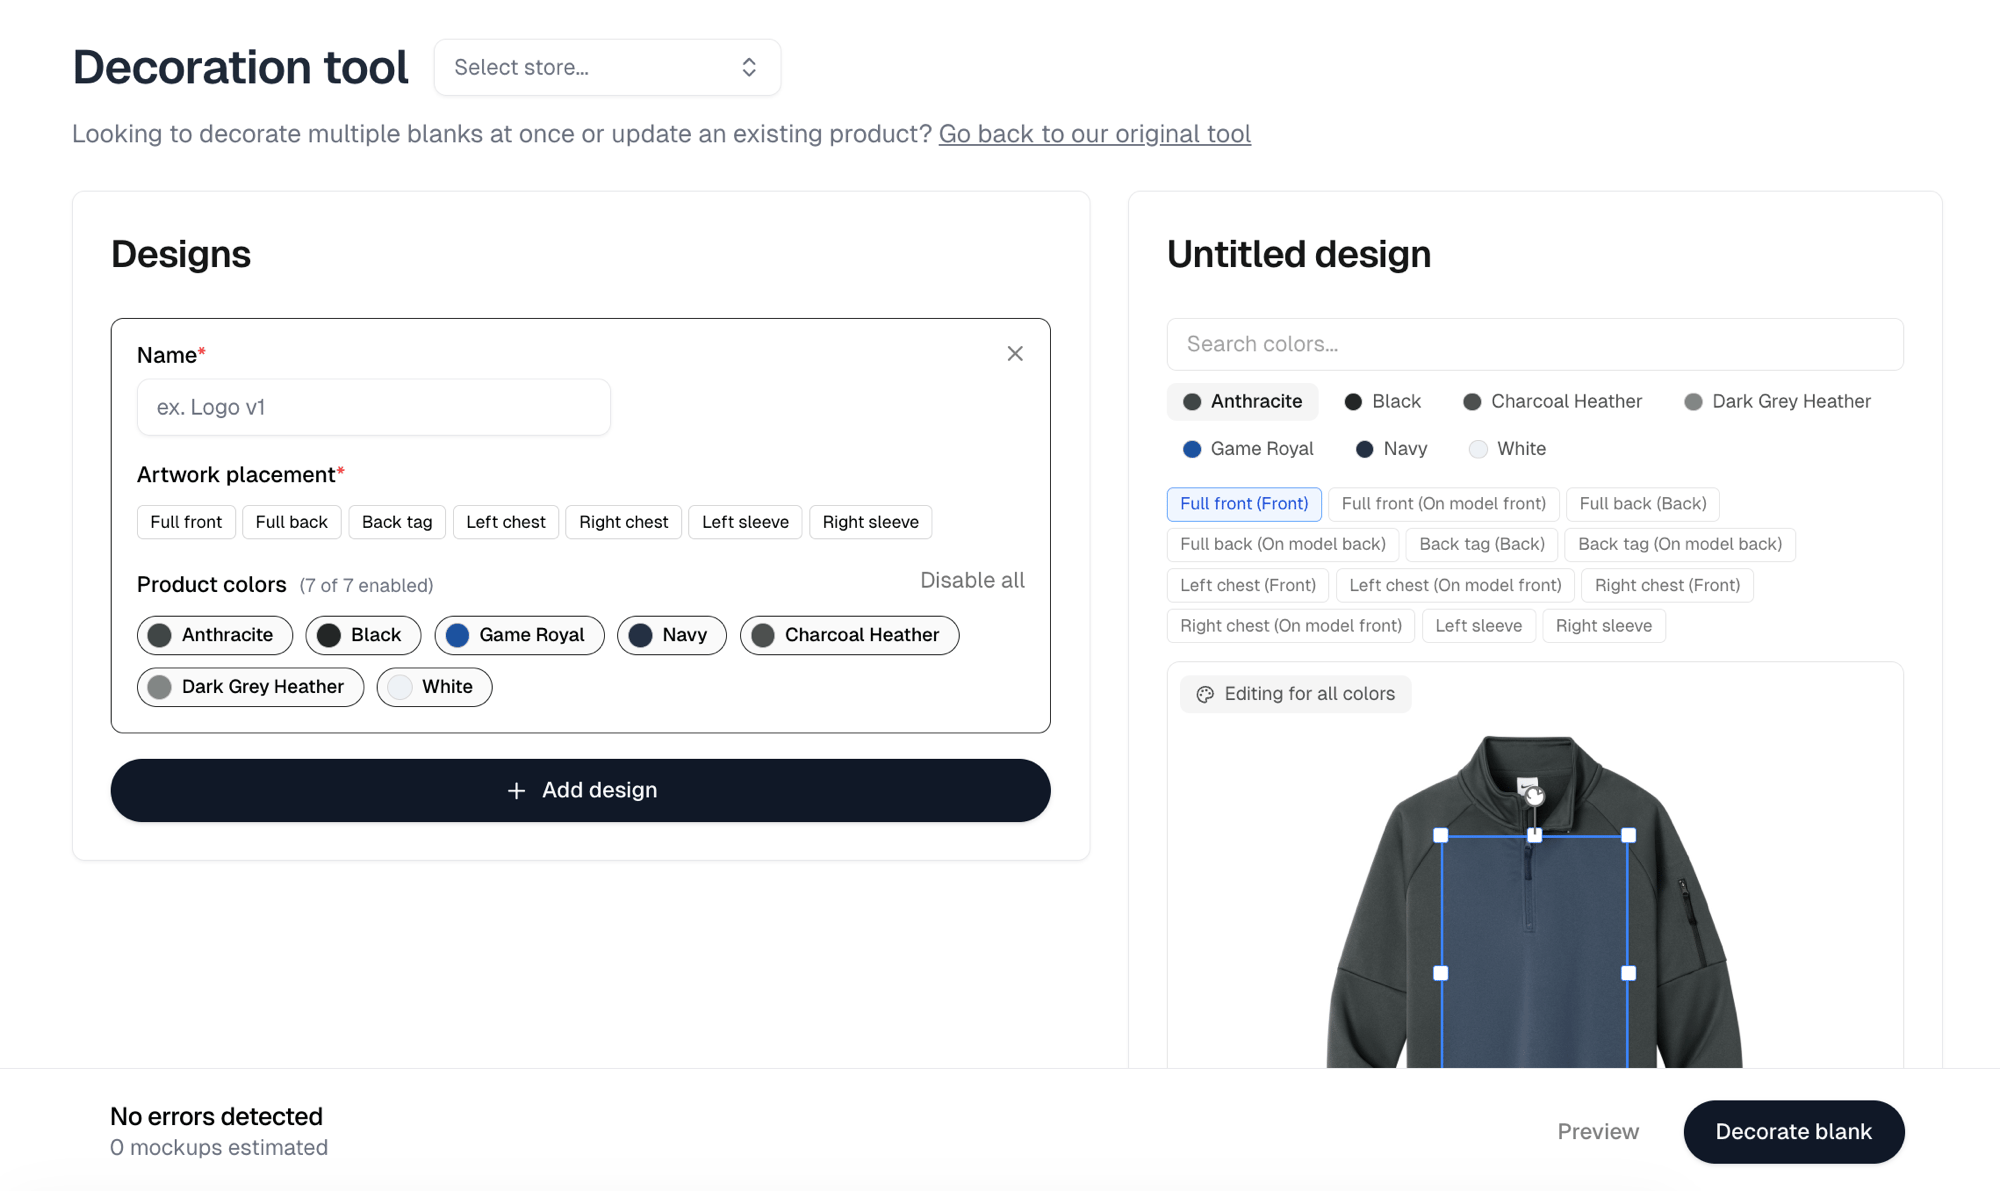
**Same blank** opens a **Decorate a blank** picker. Choose one and you land in
the [decoration tool](/help/knowledge-base/blanks/decorate), which is also reachable
from any blank if you want to decorate one directly rather than starting from
Products. A discontinued blank is listed but cannot be picked.
Unless your business has exactly one store, a **Select a store** dialog
opens first. **Skip** leaves it unset, and the picker beside the page title
sets it later. One design can be created with no store. Two or more designs
become a product group, and a group cannot be saved until a store is set.
Each design needs a **Name**, up to 60 characters. Once there is more than
one design, that name is the label customers choose between on the finished
product group, so name it for what it is rather than "design 1".
Select one or more placements under **Artwork placement**, such as left
chest or full back. Each one you select adds a row below it where you pick
the artwork, and on a supplier blank a **Decoration method**. Leaving the
method blank uses the blank's own.
A placement greys out when another placement in the same design already
claims the view it would render on. Left chest and full front both render
on the front view, so selecting one disables the other.
**Product colors** decides which colors the product carries. The link beside
it reads **Disable all** while every color is on and **Enable all** once any
is off. **Disable all** leaves one color on rather than none, so you can
turn on just the few you want.
When the artwork has more than one colorway, each product color gets its
own, so a design can print light on dark garments and dark on light.
**Automatically assign colorways to light/dark colors** does the pairing,
and you can override any row. An artwork with a single colorway skips this
step.
Several placements on one design is how you get a left chest logo and a back
tag on one garment. **Add design** does something else: each design becomes its
own product, and two or more are collected into a product group that customers
pick between. A group holds at most 20 designs.
 ### Before you commit
The footer estimates how many mockups will be generated, one per placement, per
color, per view. The cap is 1000. Over it the footer says so and
**Decorate blank** stays disabled until you narrow the selection.
Choosing embroidery for artwork with no `.dst` file is flagged as you configure
it. The design still saves, but it carries no stitch count, so the embroidery
upcharge rule computes nothing. Both routes warn about this.
**Preview** shows the result, and turns on once a placement has artwork on it.
**Decorate blank** creates the products.
## One design, many blanks
**Same artwork** opens an **Apply artwork** picker instead. Pick one and you land
on that artwork's own page, scrolled to its
[Apply to products](/help/knowledge-base/artwork/apply) section, so you can come back
to it later to put this design on more blanks.
Choose the blanks you want it on, set a placement for each, then the same color
and colorway steps as above. **Import collection** pulls in a whole collection
of blanks at once, and appears only once you have a collection.
The **Decorated products** tab applies the design to products you already
decorated, rather than to bare blanks. A placement there that already holds a
different artwork is flagged, because applying replaces it.
A blank carrying none of your enabled colors is skipped entirely, which is why a
product you expected sometimes does not appear in the result.
**Destination store** drops the results straight into a store. It sits on the
**Blanks** tab only, and leaving it on **None** is a real answer. **Decoration
method** defaults to **Use each product's default**.
### Before you commit
The footer estimates how many mockups will be generated, one per placement, per
color, per view. The cap is 1000. Over it the footer says so and
**Decorate blank** stays disabled until you narrow the selection.
Choosing embroidery for artwork with no `.dst` file is flagged as you configure
it. The design still saves, but it carries no stitch count, so the embroidery
upcharge rule computes nothing. Both routes warn about this.
**Preview** shows the result, and turns on once a placement has artwork on it.
**Decorate blank** creates the products.
## One design, many blanks
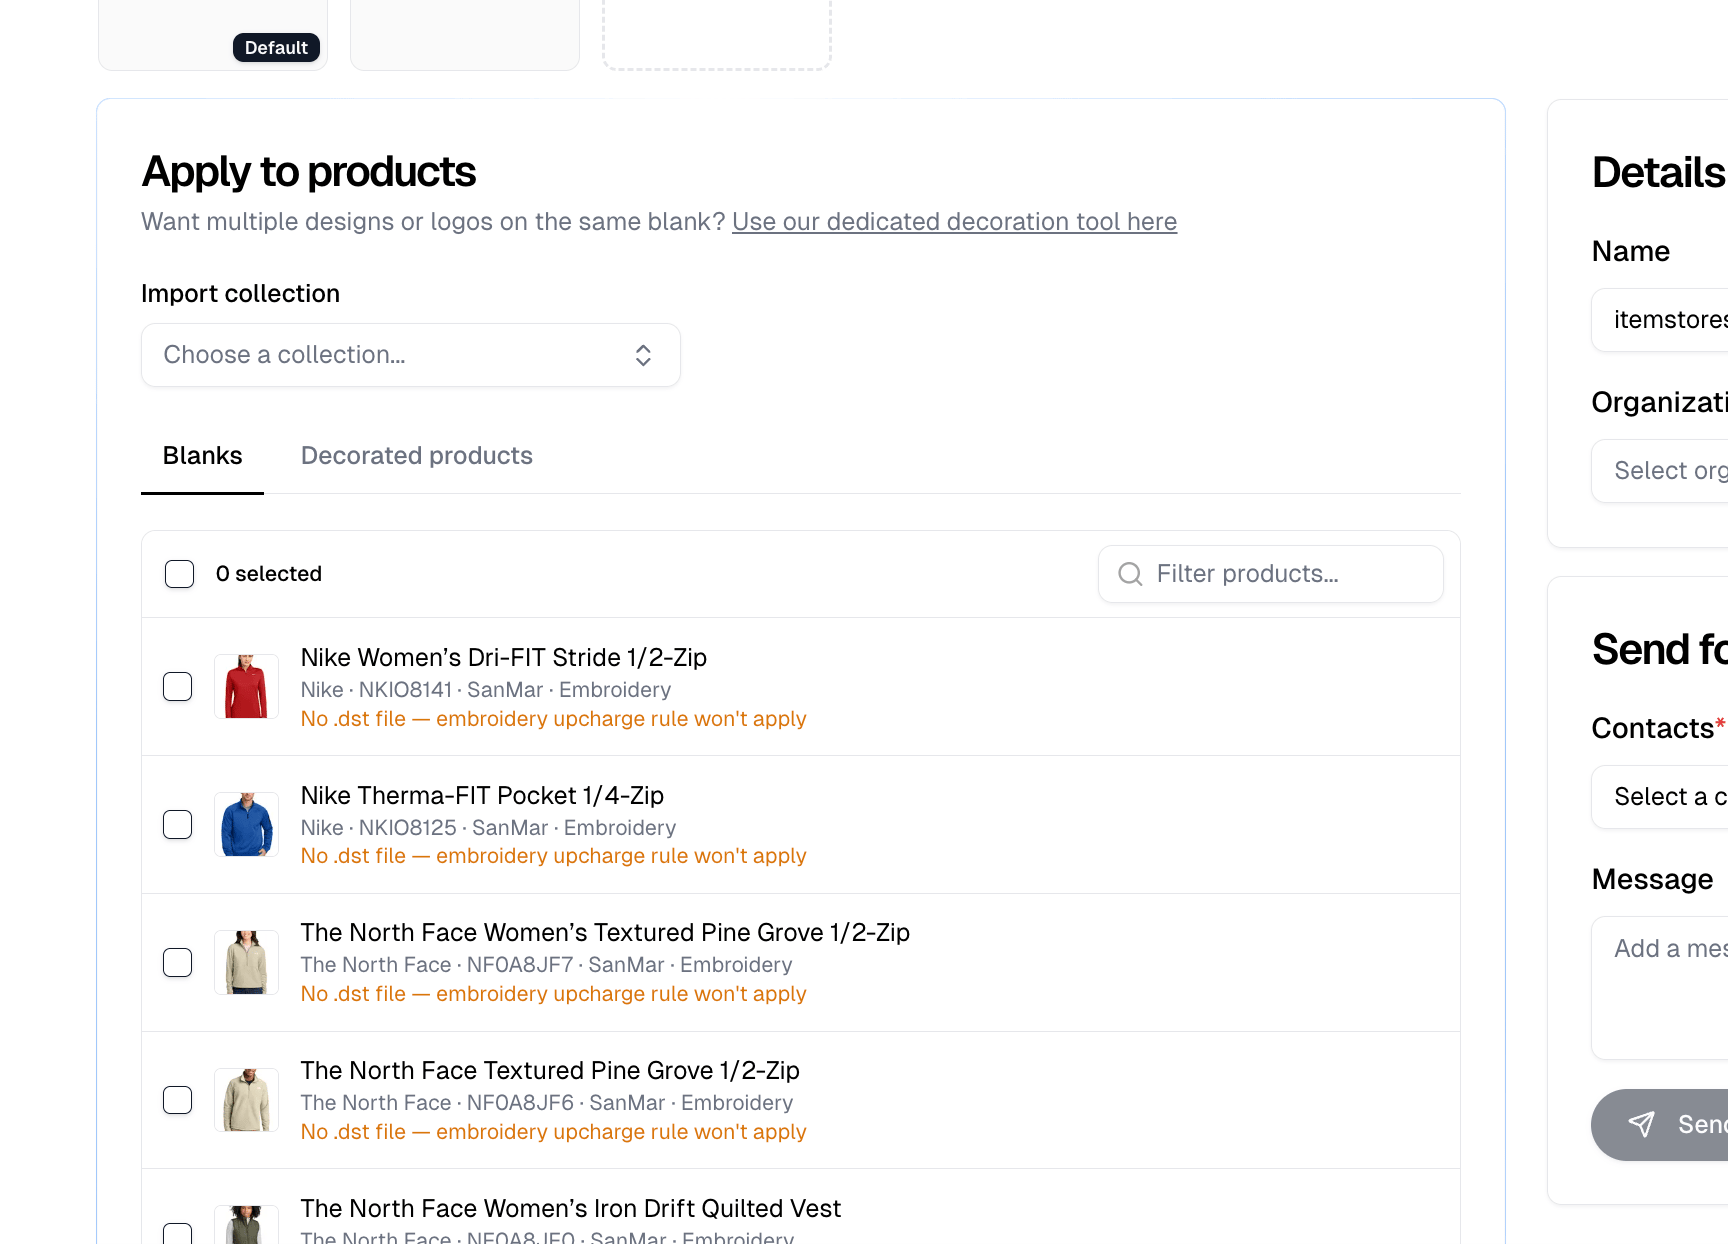
**Same artwork** opens an **Apply artwork** picker instead. Pick one and you land
on that artwork's own page, scrolled to its
[Apply to products](/help/knowledge-base/artwork/apply) section, so you can come back
to it later to put this design on more blanks.
Choose the blanks you want it on, set a placement for each, then the same color
and colorway steps as above. **Import collection** pulls in a whole collection
of blanks at once, and appears only once you have a collection.
The **Decorated products** tab applies the design to products you already
decorated, rather than to bare blanks. A placement there that already holds a
different artwork is flagged, because applying replaces it.
A blank carrying none of your enabled colors is skipped entirely, which is why a
product you expected sometimes does not appear in the result.
**Destination store** drops the results straight into a store. It sits on the
**Blanks** tab only, and leaving it on **None** is a real answer. **Decoration
method** defaults to **Use each product's default**.
 ## What you end up with
One product per design on the **Same blank** route, one per blank on the **Same
artwork** route. Each carries your artwork at the placements you chose, with
every color you left enabled as its color options.
From here you can price them with [pricing rules](/help/knowledge-base/pricing-rules), put
them in a [store](/help/tutorials/your-first-store), or quote them.
Everything a product can do afterwards, including hiding colors, size charts and
personalization, is in the [Products guide](/help/knowledge-base/products). For the two tools
above in full, see [Decoration tool](/help/knowledge-base/blanks/decorate) and
[Apply to products](/help/knowledge-base/artwork/apply).
## What you end up with
One product per design on the **Same blank** route, one per blank on the **Same
artwork** route. Each carries your artwork at the placements you chose, with
every color you left enabled as its color options.
From here you can price them with [pricing rules](/help/knowledge-base/pricing-rules), put
them in a [store](/help/tutorials/your-first-store), or quote them.
Everything a product can do afterwards, including hiding colors, size charts and
personalization, is in the [Products guide](/help/knowledge-base/products). For the two tools
above in full, see [Decoration tool](/help/knowledge-base/blanks/decorate) and
[Apply to products](/help/knowledge-base/artwork/apply).