> ## Documentation Index
> Fetch the complete documentation index at: https://itemstores.com/help/llms.txt
> Use this file to discover all available pages before exploring further.
# Run a points store
> Give people a balance to spend instead of their own money
A points store is one where the people buying spend an allowance you gave them.
Uniform programs, staff swag and reward catalogs all work this way.
Turn on **Points system** when you create the store, or on the store afterwards.
Each redemption carries a fee, billed to you rather than to the participant. The
rates are in [Licenses and limits](/help/tutorials/licenses-and-limits).
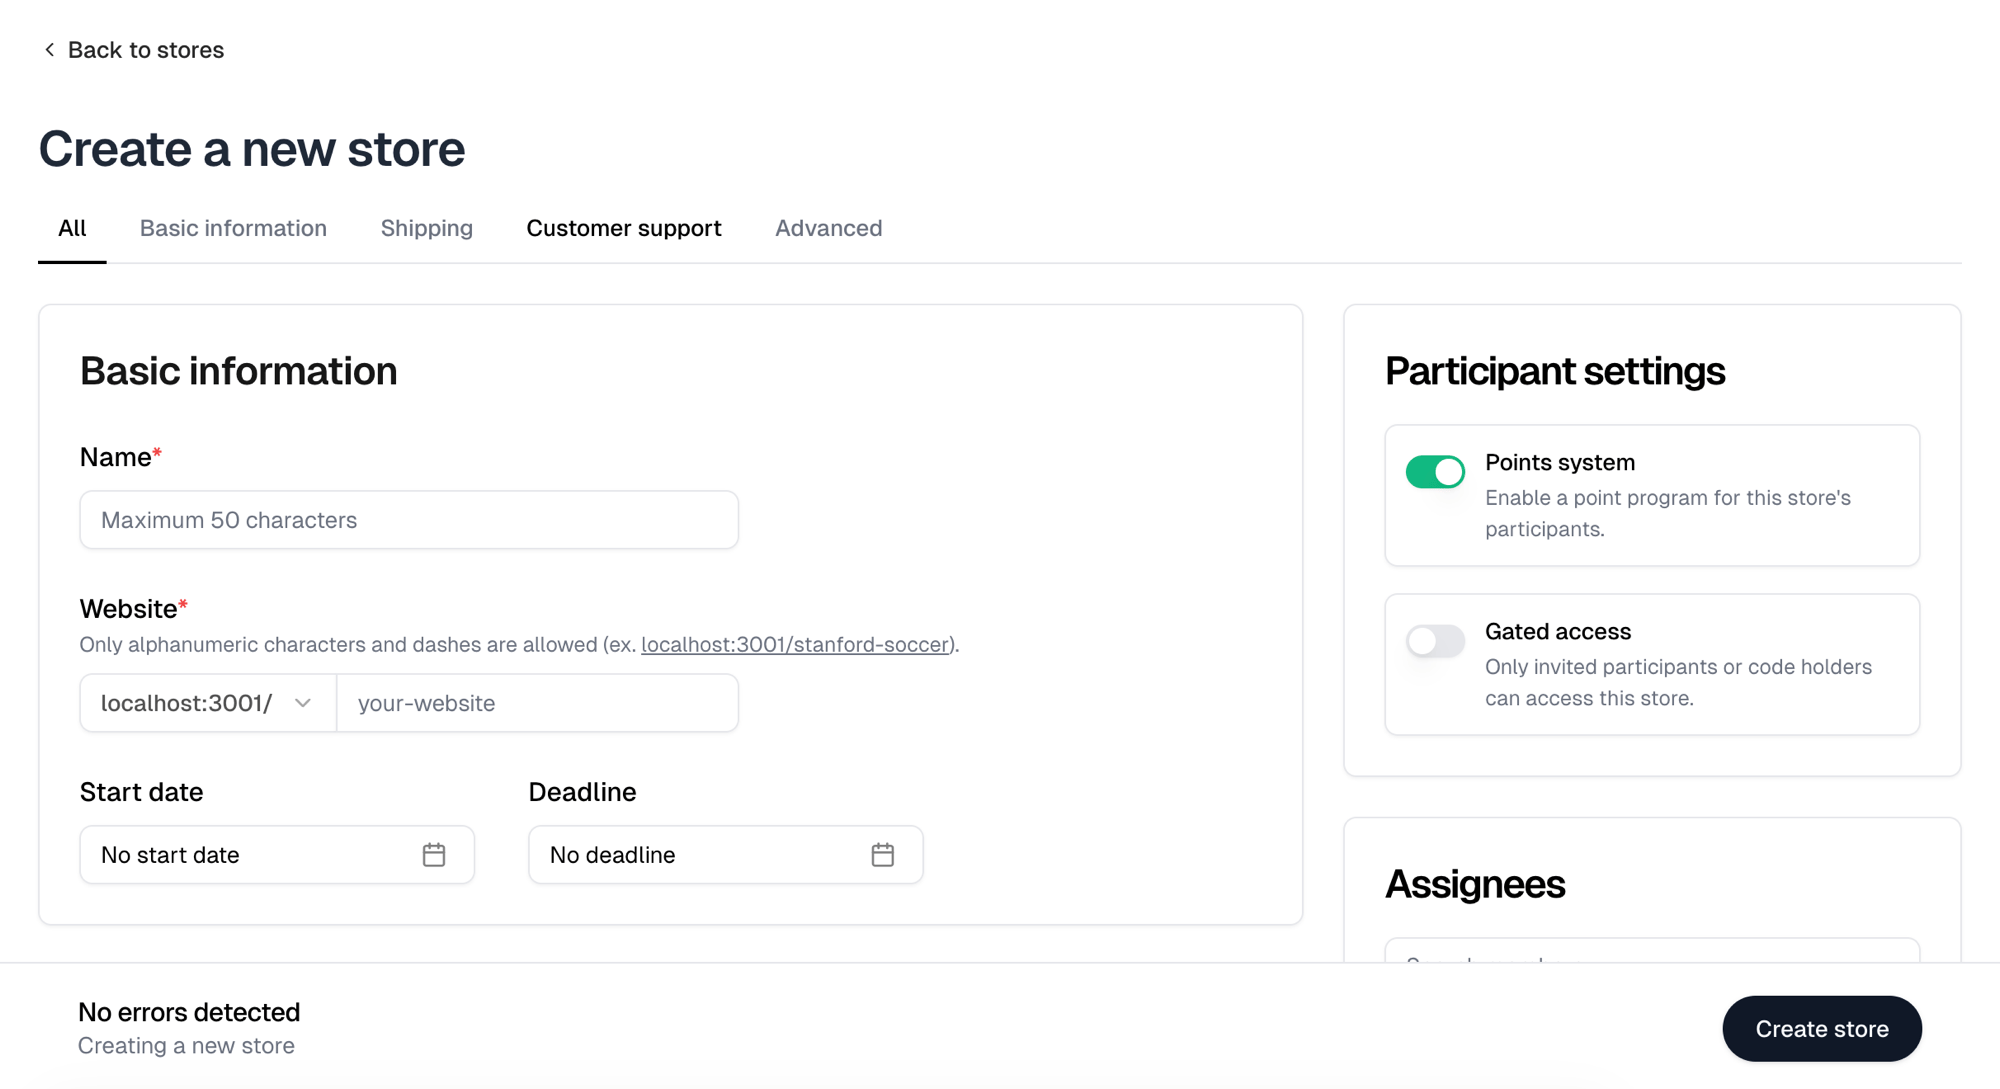 ## What a point is worth
A point is one cent, and the rate is fixed. There is nothing to set, so a \$20
shirt always costs 2,000 points. Every balance in the app is listed in currency
rather than points.
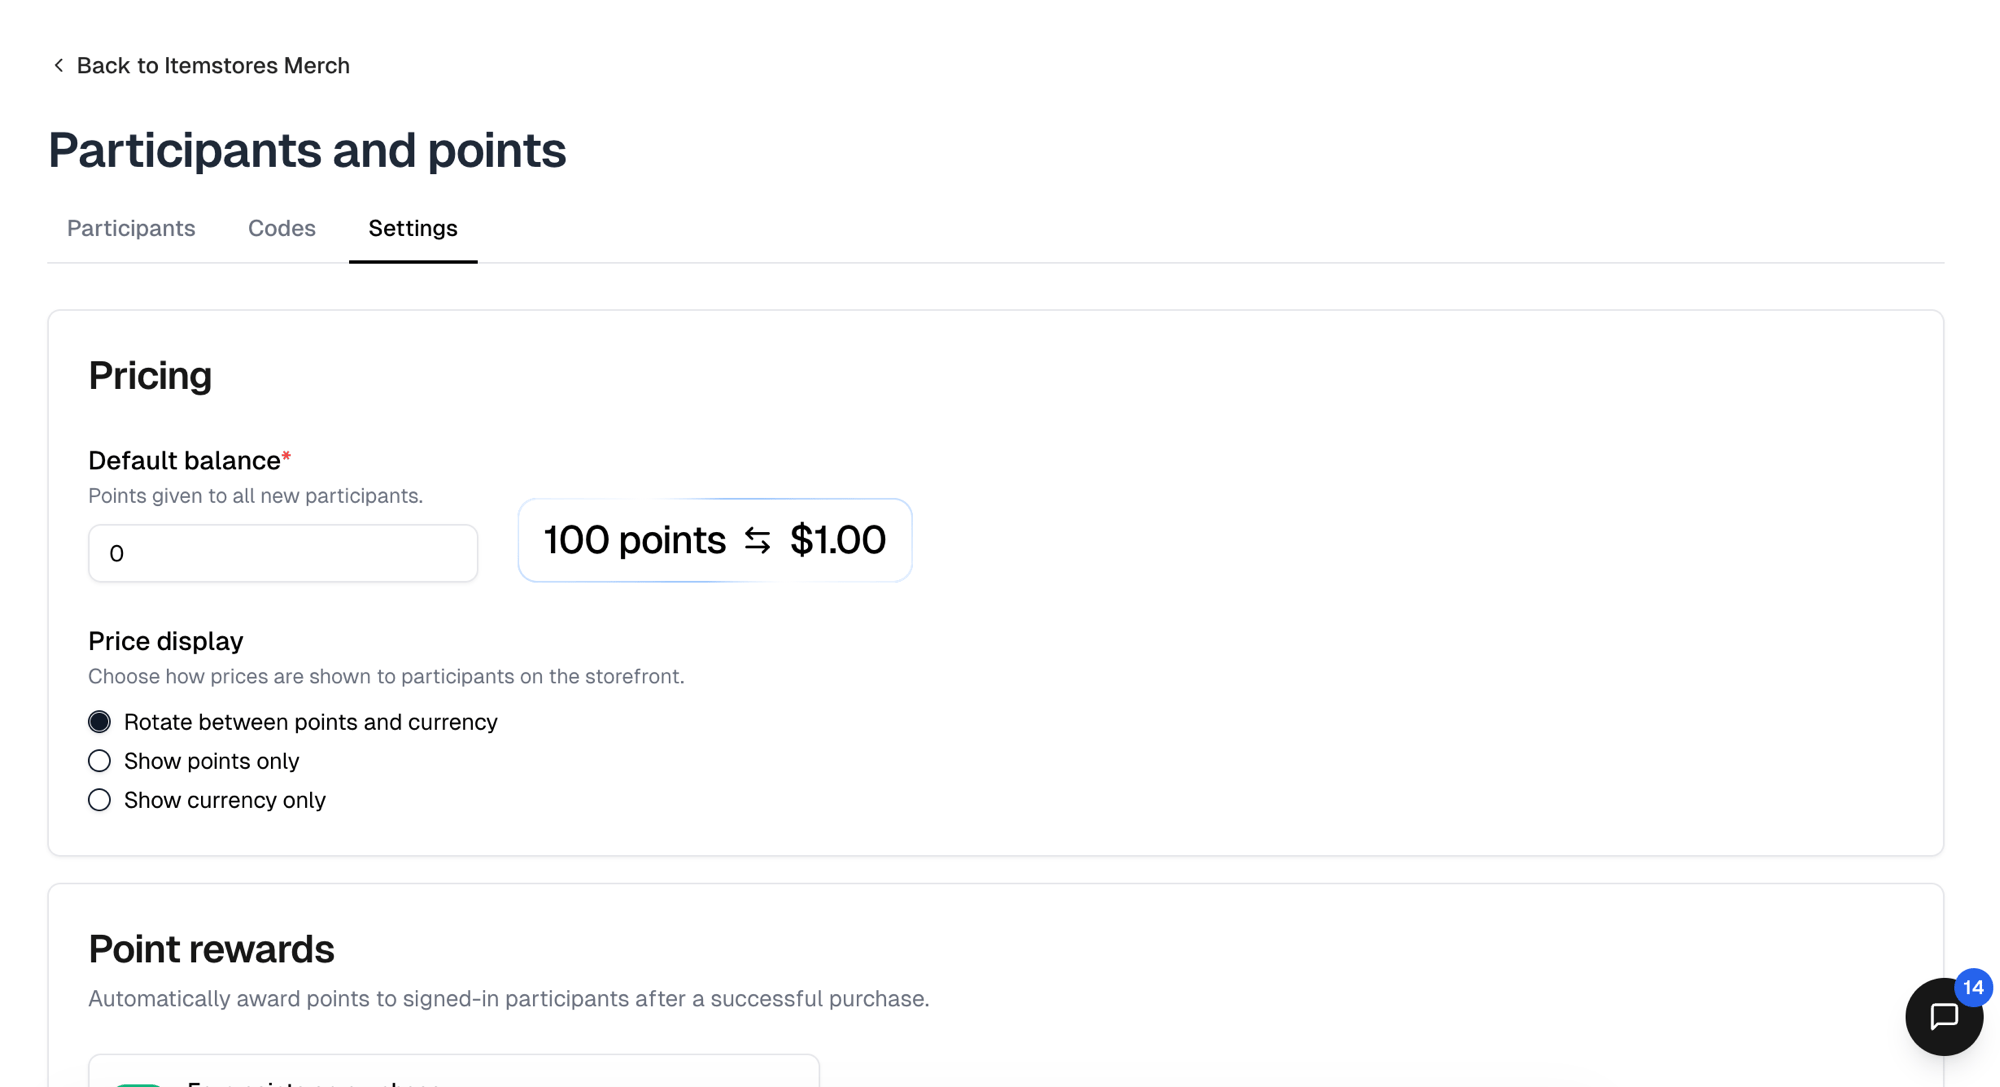
The rest of the program lives in the store's **Participants and points**, on the
**Settings** tab. The strip beside **Default balance** there converts that
balance into currency; it is not a rate you can change.
## Choose how prices look
| Option | Shows |
| ---------------------------------- | --------------------------------------- |
| Rotate between points and currency | Alternates between the two. The default |
| Show points only | Participants never see dollar prices |
| Show currency only | Prices stay in currency |
**Show points only** suits a store where the allowance is the whole point and
money would only confuse people.
## What a point is worth
A point is one cent, and the rate is fixed. There is nothing to set, so a \$20
shirt always costs 2,000 points. Every balance in the app is listed in currency
rather than points.
The rest of the program lives in the store's **Participants and points**, on the
**Settings** tab. The strip beside **Default balance** there converts that
balance into currency; it is not a rate you can change.
## Choose how prices look
| Option | Shows |
| ---------------------------------- | --------------------------------------- |
| Rotate between points and currency | Alternates between the two. The default |
| Show points only | Participants never see dollar prices |
| Show currency only | Prices stay in currency |
**Show points only** suits a store where the allowance is the whole point and
money would only confuse people.
 ## Hand out the allowance
### Codes
The usual way. Each code carries points, and you hand them out however you like.
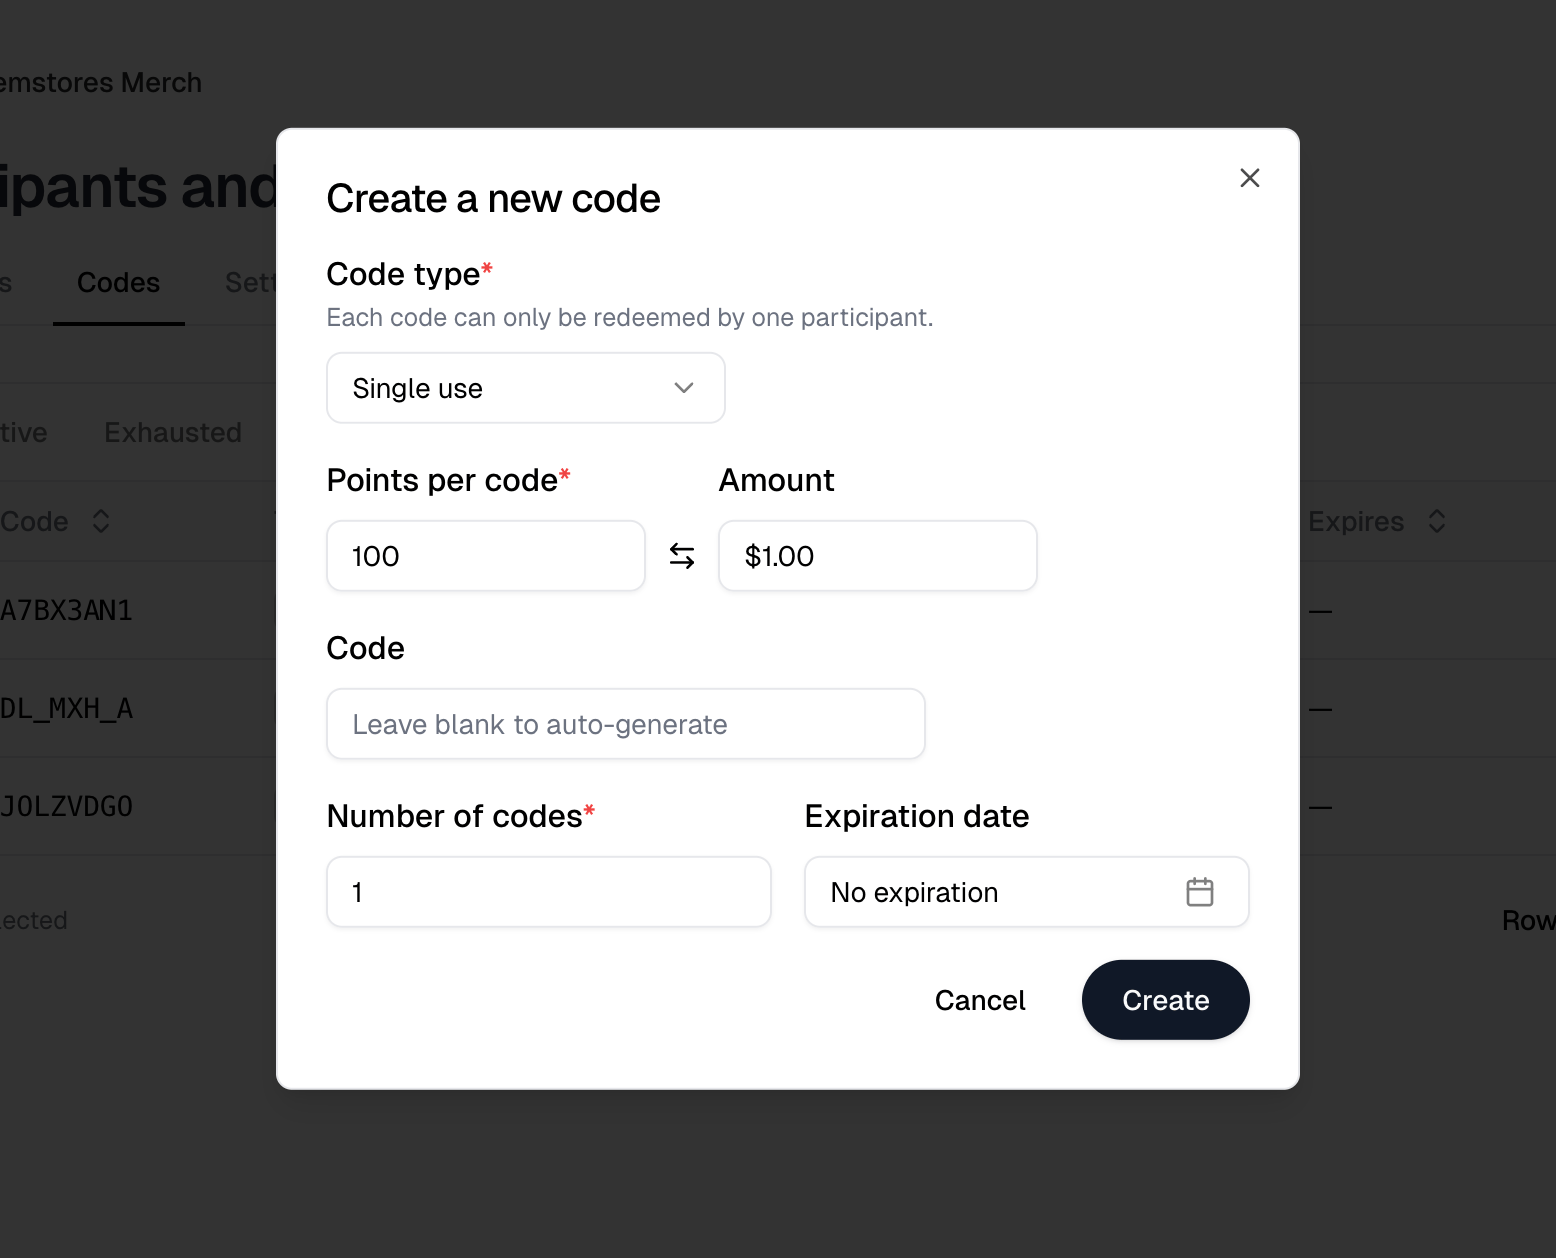
**New code** on the **Codes** tab opens **Create a new code**. Set **Points per
code**, which shows its currency equivalent beside it, and an optional
**Expiration date**.
**Code type** decides the shape of the handout:
| Type | What you get |
| ---------- | ---------------------------------------------------------------------------- |
| Single use | One code per person. **Number of codes** generates a batch |
| Multi-use | One shared code everyone enters. **Max uses** caps it, or leave it unlimited |
Single use is the usual choice, and generating a batch is also how you give
different people different amounts.
The **Code** field, where you type your own code instead of taking a generated
one, is only on screen while **Number of codes** is 1. Ask for a batch and it
disappears.
Each code's row menu carries **Share**, which gives you a link to copy and a box
to email the code to a list of addresses.
The **Codes** tab filters by **All**, **Active**, **Exhausted** and **Expired**,
so you can see what is still usable.
## Hand out the allowance
### Codes
The usual way. Each code carries points, and you hand them out however you like.
**New code** on the **Codes** tab opens **Create a new code**. Set **Points per
code**, which shows its currency equivalent beside it, and an optional
**Expiration date**.
**Code type** decides the shape of the handout:
| Type | What you get |
| ---------- | ---------------------------------------------------------------------------- |
| Single use | One code per person. **Number of codes** generates a batch |
| Multi-use | One shared code everyone enters. **Max uses** caps it, or leave it unlimited |
Single use is the usual choice, and generating a batch is also how you give
different people different amounts.
The **Code** field, where you type your own code instead of taking a generated
one, is only on screen while **Number of codes** is 1. Ask for a batch and it
disappears.
Each code's row menu carries **Share**, which gives you a link to copy and a box
to email the code to a list of addresses.
The **Codes** tab filters by **All**, **Active**, **Exhausted** and **Expired**,
so you can see what is still usable.
 ### Default balance
**Default balance** gives every new participant the same amount automatically.
Leave this at 0 unless the store is gated. On an open store, anyone who signs up
receives the balance and can spend it.
### Invites
**New participant** on the **Participants** tab offers **Email invite** for one
person, with a starting **Balance** prefilled from the default, and
**Upload CSV** for a list. The CSV takes one email per row plus an optional
points column, which overrides the default balance for that row.
### Adjusting someone later
Selecting rows on the **Participants** tab reveals a toolbar with
**Adjust balance**, **Send email**, **Download CSV** and **Delete**. There is no
standing button for any of them. **Adjust balance** there asks for an
**Operation**, one of **Increase by amount**, **Decrease by amount** or
**Set new balance**, and applies it to everyone selected.
To record why, use **Adjust balance** in a single participant's row menu
instead. That one sets an absolute **Balance** and carries a **Reason** field.
The toolbar version has no **Reason**.
## Earning points back
Participants do not earn points by spending unless you say so. **Earn points on
purchase** is off by default, so a store only ever hands out what you allocate
until you turn it on.
Turning it on reveals **Earn rate**, in points per cent, which starts at 0. Left
at 0 nothing is ever earned. An earn rate of 0.01 is 1 point per \$1.00 spent.
## Keeping track
The **Participants** tab lists everyone with their **Balance** in currency, a
**Source** badge for how they joined, the date they **Joined**, and the date they
were **Invited**. Someone who has not accepted yet has no join date. Filter with
**All**, **Joined** and **Pending**.
## Restricting who can get in
Most points stores do not need this. Points are usually controlled by who
receives a code, and the store itself can stay open.
Turn on **Gated access** when the store should not be publicly reachable at all,
such as a staff store you do not want customers finding.
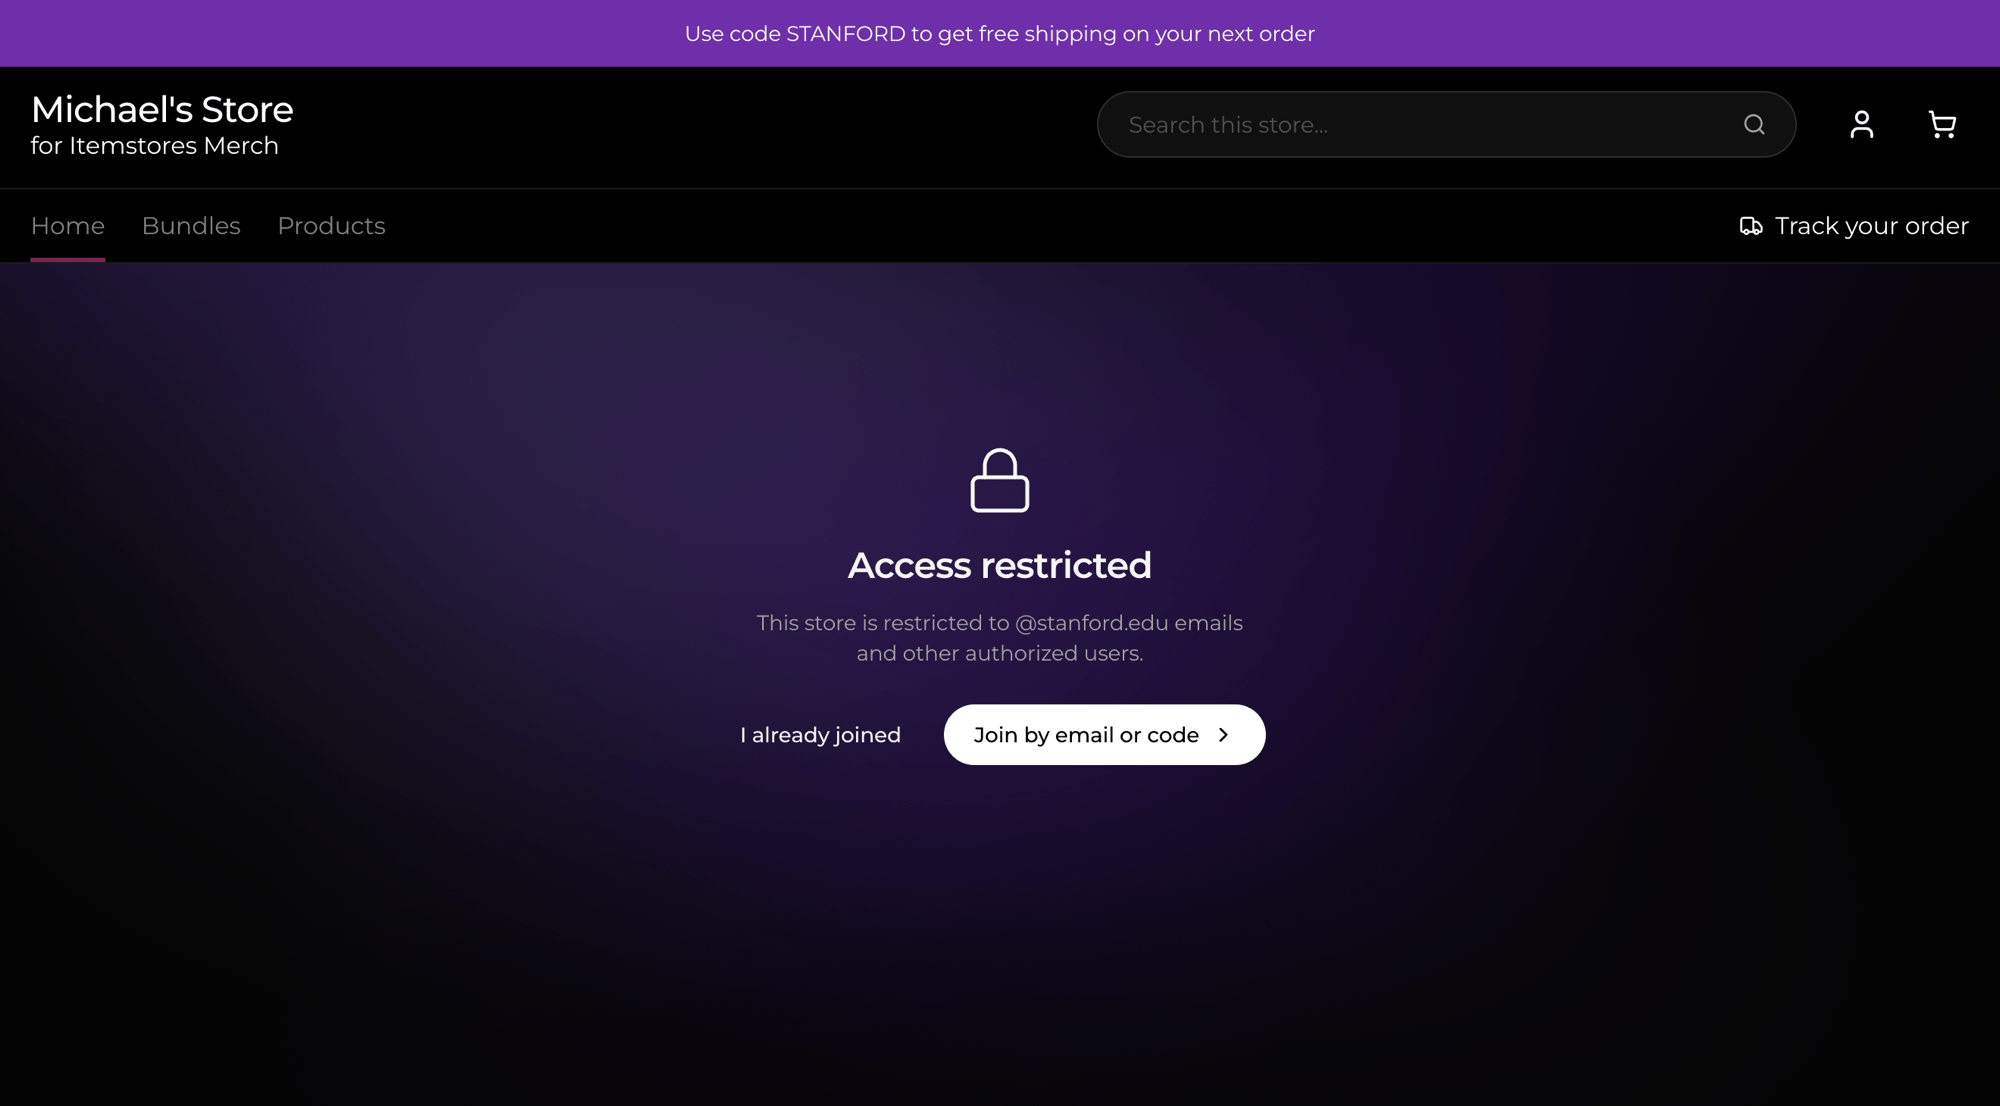
A gated store shows **Access restricted** instead of products, and people get in
one of three ways:
| Route | How it works |
| ---------------- | ------------------------------------------------------------- |
| Invite | You invite specific email addresses |
| Code | They enter a code you gave them |
| Domain allowlist | Anyone with an email on a domain you list can join themselves |
The domain allowlist suits a company or school store, where inviting people one
at a time would be tedious. The restricted screen then names the allowed domain.
**Verify identity only** pairs with the allowlist. People who join that way
start at 0 points rather than the default balance, which is what you want when
the allowance comes from codes.
Returning participants use **I already joined** and get a sign-in link by email.
There is no password.
### Default balance
**Default balance** gives every new participant the same amount automatically.
Leave this at 0 unless the store is gated. On an open store, anyone who signs up
receives the balance and can spend it.
### Invites
**New participant** on the **Participants** tab offers **Email invite** for one
person, with a starting **Balance** prefilled from the default, and
**Upload CSV** for a list. The CSV takes one email per row plus an optional
points column, which overrides the default balance for that row.
### Adjusting someone later
Selecting rows on the **Participants** tab reveals a toolbar with
**Adjust balance**, **Send email**, **Download CSV** and **Delete**. There is no
standing button for any of them. **Adjust balance** there asks for an
**Operation**, one of **Increase by amount**, **Decrease by amount** or
**Set new balance**, and applies it to everyone selected.
To record why, use **Adjust balance** in a single participant's row menu
instead. That one sets an absolute **Balance** and carries a **Reason** field.
The toolbar version has no **Reason**.
## Earning points back
Participants do not earn points by spending unless you say so. **Earn points on
purchase** is off by default, so a store only ever hands out what you allocate
until you turn it on.
Turning it on reveals **Earn rate**, in points per cent, which starts at 0. Left
at 0 nothing is ever earned. An earn rate of 0.01 is 1 point per \$1.00 spent.
## Keeping track
The **Participants** tab lists everyone with their **Balance** in currency, a
**Source** badge for how they joined, the date they **Joined**, and the date they
were **Invited**. Someone who has not accepted yet has no join date. Filter with
**All**, **Joined** and **Pending**.
## Restricting who can get in
Most points stores do not need this. Points are usually controlled by who
receives a code, and the store itself can stay open.
Turn on **Gated access** when the store should not be publicly reachable at all,
such as a staff store you do not want customers finding.
A gated store shows **Access restricted** instead of products, and people get in
one of three ways:
| Route | How it works |
| ---------------- | ------------------------------------------------------------- |
| Invite | You invite specific email addresses |
| Code | They enter a code you gave them |
| Domain allowlist | Anyone with an email on a domain you list can join themselves |
The domain allowlist suits a company or school store, where inviting people one
at a time would be tedious. The restricted screen then names the allowed domain.
**Verify identity only** pairs with the allowlist. People who join that way
start at 0 points rather than the default balance, which is what you want when
the allowance comes from codes.
Returning participants use **I already joined** and get a sign-in link by email.
There is no password.
 Everything above in reference form is in the
[Participants and points guide](/help/knowledge-base/stores/participants).
Everything above in reference form is in the
[Participants and points guide](/help/knowledge-base/stores/participants).