> ## Documentation Index
> Fetch the complete documentation index at: https://itemstores.com/help/llms.txt
> Use this file to discover all available pages before exploring further.
# Decoration tool
> Turn a blank into products by placing artwork on it
Open a [blank](/help/knowledge-base/blanks) and select **Decoration tool**.
Unless your business has exactly one store, it opens on a store picker. **Skip**
is a real answer for a single design. Two or more designs become a product group,
and a group cannot be saved without a store.
Each design on the left needs a **Name** and at least one **Artwork placement**.
Selecting a placement adds a row beneath it where you pick the artwork, and on a
supplier blank a decoration method. Leave the method blank and the design uses
the blank's own.
A placement greys out when another placement in the same design already claims
the view it would render on. Left chest and full front both render on the front
view, so selecting one disables the other. Placements in other designs have no
effect on it.
Several placements on one design is how you get a left chest logo and a back tag
on one garment. **Add design** does something else: each design becomes its own
product, and two or more are collected into a product group that customers pick
between. A design's **Name** is the label they pick between, up to 60 characters.
A group holds at most 20 designs.
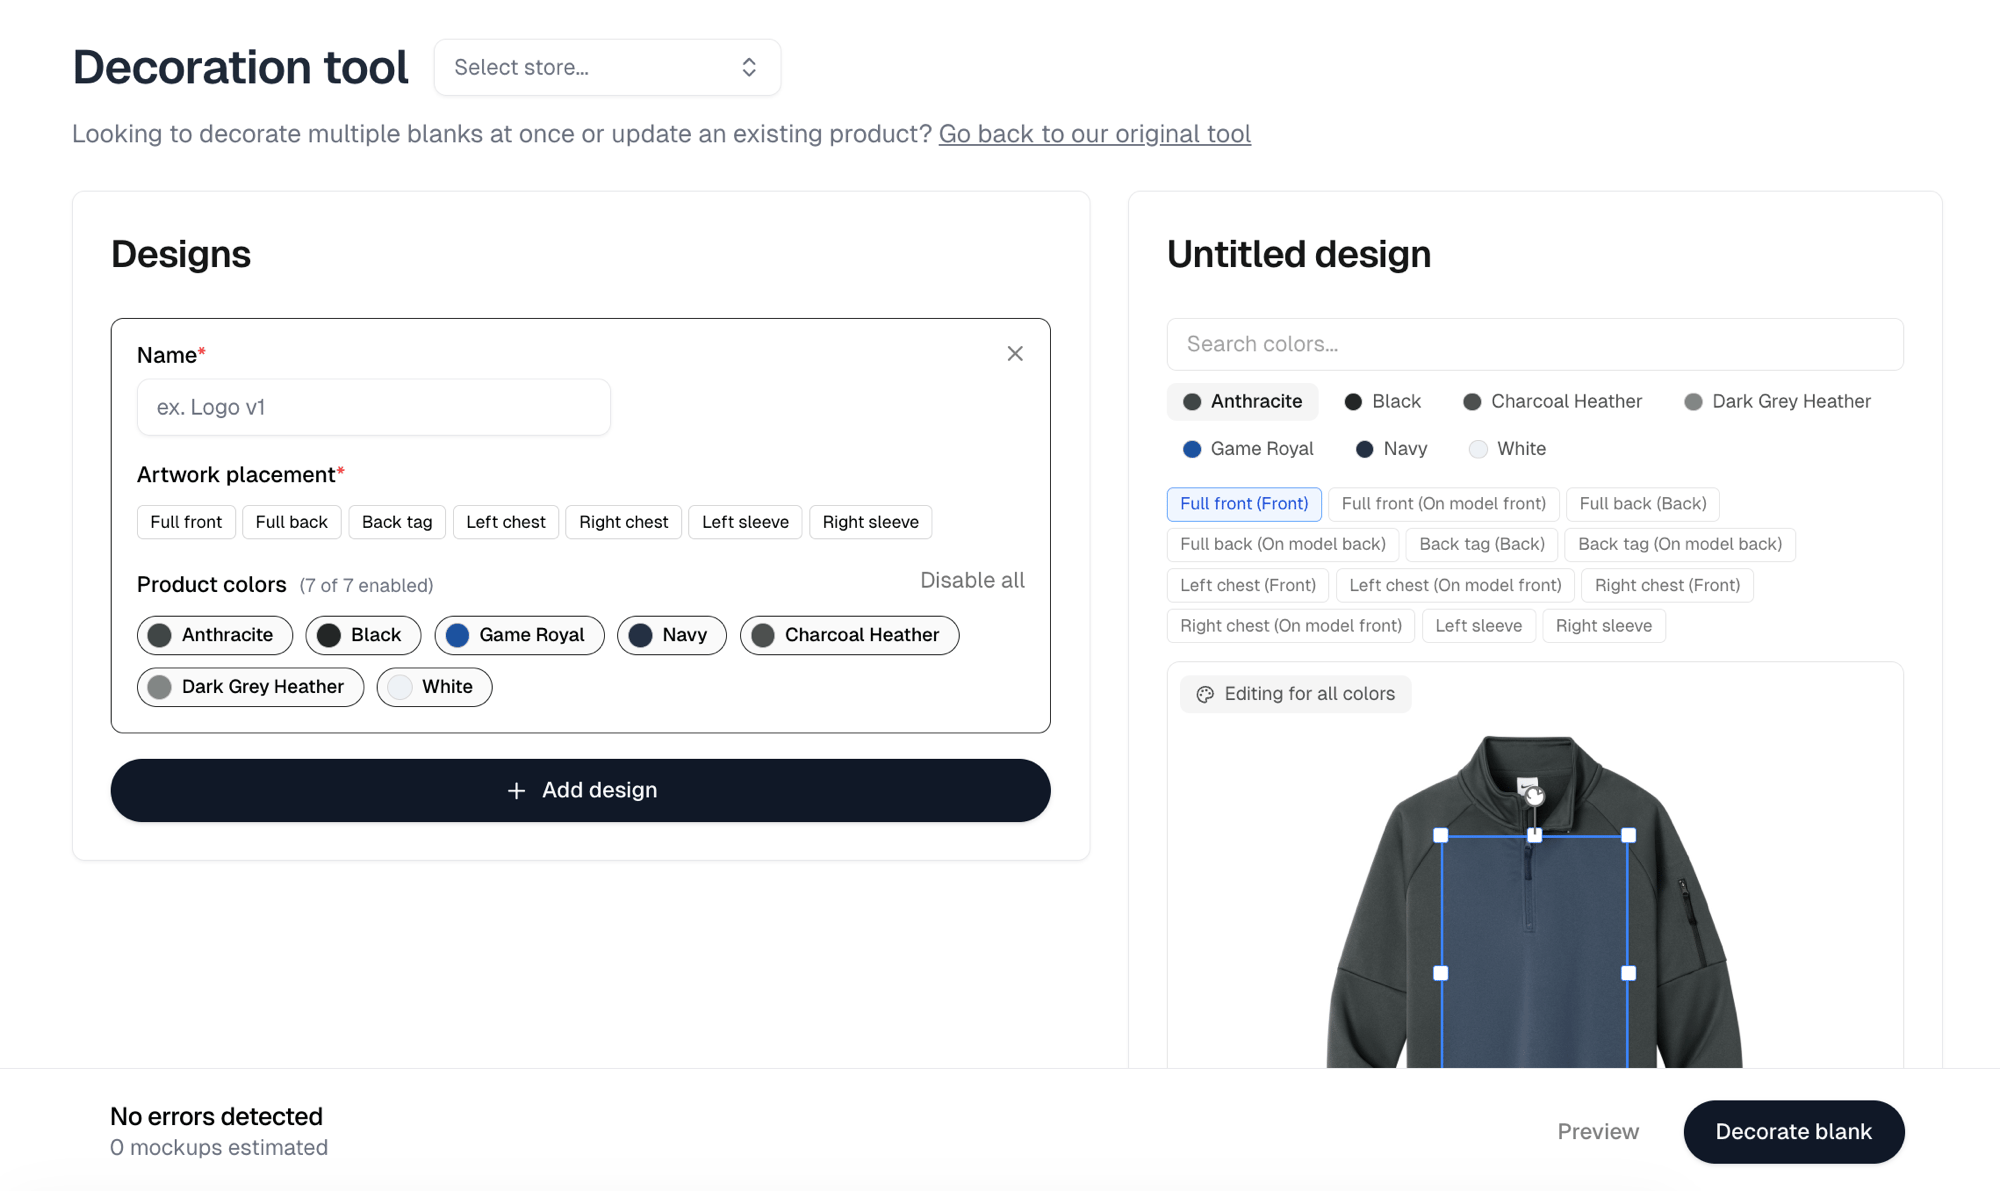 ## Choosing colors
**Product colors** controls which colors this design is made for. The link beside
it reads **Disable all** while every color is on and **Enable all** once any is
off. **Disable all** leaves one color on rather than none, so you can turn on
just the few you want rather than switching off the rest.
## Colorways per color
Each product color gets its own colorway of the artwork, so a design can print
light on dark garments and dark on light ones. An artwork with a single colorway
skips this, since there is nothing to choose.
**Automatically assign colorways to light/dark colors** does that pairing for
you, and you can override any row afterwards.
From six colors up the table gains a search box, and it lists eight at a time
with a link to the rest.
## Choosing colors
**Product colors** controls which colors this design is made for. The link beside
it reads **Disable all** while every color is on and **Enable all** once any is
off. **Disable all** leaves one color on rather than none, so you can turn on
just the few you want rather than switching off the rest.
## Colorways per color
Each product color gets its own colorway of the artwork, so a design can print
light on dark garments and dark on light ones. An artwork with a single colorway
skips this, since there is nothing to choose.
**Automatically assign colorways to light/dark colors** does that pairing for
you, and you can override any row afterwards.
From six colors up the table gains a search box, and it lists eight at a time
with a link to the rest.
 ## Before you commit
The footer estimates how many mockups will be generated, one per placement, per
color, per view. The cap is 1,000. Over it the footer says so and **Decorate
blank** stays disabled until you narrow the selection.
If a placement's decoration method resolves to embroidery and the artwork has no
`.dst` file, the row says the embroidery upcharge rule will not apply. The design
still saves, but it carries no stitch count, so the embroidery upcharge rule
computes nothing.
**Preview** shows the result and turns on once a placement has artwork on it.
**Decorate blank** creates the products.
## Before you commit
The footer estimates how many mockups will be generated, one per placement, per
color, per view. The cap is 1,000. Over it the footer says so and **Decorate
blank** stays disabled until you narrow the selection.
If a placement's decoration method resolves to embroidery and the artwork has no
`.dst` file, the row says the embroidery upcharge rule will not apply. The design
still saves, but it carries no stitch count, so the embroidery upcharge rule
computes nothing.
**Preview** shows the result and turns on once a placement has artwork on it.
**Decorate blank** creates the products.